Showing posts with label technique. Show all posts

Saturday, 26 September 2015

7 Daily Exercise for PHOTOGRAPHERS

for every Photographer to become perfectionist.

The saying ‘practice makes perfect’ is as valid for photography as any other activity, so in their latest guest blog post the photo management and irista experts at Photoventure put together a collection of exercises that will help you become a better photographer.

1. Spot meter

Modern metering systems have great general-purpose modes, often called Evaluative, Matrix or Multi-area, which do a great job of accessing a scene and setting good ‘average’ exposure settings in many situations.
However, they’re not 100% foolproof and very dark or very light scenes, or backlighting can trick them into over or under exposure.
They’re also not psychic and don’t know what you’re seeing in your head when you take a shot.
Switching to spot metering puts you in control of where the camera meters from and helps you develop a much better understanding of the tonal range in a scene.
A standard spot metering system allows you to meter from a very small part of the scene and it suggests exposure settings that will render your target a mid-tone.
Consequently, you need to take care with the positioning of this spot, study the scene carefully and decide which is the best area to take a reading from.
It’s often helpful to combine spot metering with AE Lock as this will fix the exposure settings (after metering) while you compose the image.
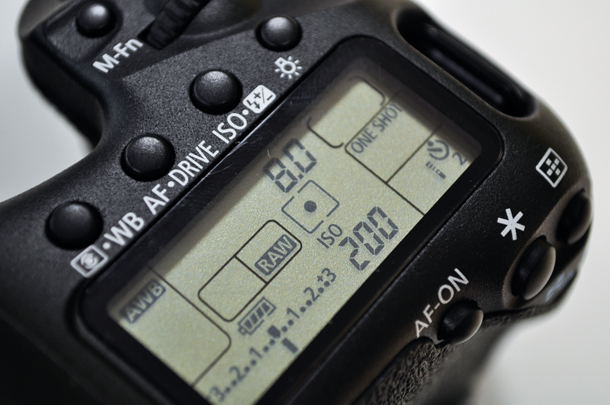
Spot-Meter


To Be  Continued.......

Saturday, 13 June 2015

9 creative photo ideas to try in June

As part of our ongoing series to help you get more creative with your digital camera, each month we publish some fun, seasonal, creative photo ideas to help inspire your imagination. Along with some amazing images, we’ve also provided some quick photography tips by both amateur and professional photographers who are experts in these fields.
We’re kicking off June with a new list of exciting photo projects like making 3D images, shooting solely with a 50mm lens, making composites and planning your travel photography!

01. Hit the road
Phgr. Kartik Rawal

While the road trip tends to be more associated with novels like On the Road and iconic movies like Easy Rider, photographers have long been inspired by the open road’s visual possibilities and promise of adventure.

Don’t worry though if you don’t have Monument Valley or Route 66 within striking distance, as the spirit of open-road photography can be channelled wherever you are in the world.
This stunning image was taken by photographer Kartik Rawal during a photographic trip to Mount Abu.

“We were lucky with the weather because it’s very unusual to get such sunny day in ABU. For this image, I used a Canon EOS 5D Mark II SLR with a 17-40mm f/4 lens and graduated Neutral Density filter.” Kartik says

While it may be hard to find an open road that stays empty for very long in the cities, the classic image of tarmac snaking into an undiscovered distance remains as alluring and compelling as ever. 

Get started today

  • While you don’t need a totally empty road for this kind of image, it helps with impact, so be prepared to get up well before the traffic. The light tends to much better just after sunrise as well


  • You can borrow many techniques and tips from landscape photography – use a tripod (where it’s safe to do so) to keep shots sharp, and set a narrow aperture (higher f number) to maximise depth of field and front to back sharpness. Don’t set too narrow an aperture, however, as your image can end up softer because of diffraction


  • Kartik used a graduated ND filter to balance the sky with the middle and foreground, ensuring each section was well exposed. If you don’t have a filter on you, the Graduated Filter tool in Lightroom can also help to give dramatic skies with well-lit foregrounds but use it sparingly. Fixing bad underexposure will also generate noise.


  • Try to avoid distractions and clutter by the side of the road, like litter bins, bus shelters and so on.


Stay tuned For more!...

Thursday, 21 May 2015

Guide To LONG EXPOSURES

What is a long exposure and why is it an important technique for photographers?
If you’re new to photography you might understandably have a few questions about how to shoot a long exposure.
In our latest YPS guide we answer some of the most common questions asked by new photographers.

What is a long exposure?

When you start photography, the basic aim is to take a photograph that is exposed correctly while hand-holding your camera.
But as you develop your skills, you’ll discover that a whole range of creative outcomes are possible when you allow the camera’s exposure – the period of time the shutter is actually open so light reaches the sensor – to last for a period running into several seconds, minutes, even hours in some cases.

What is the drawback(Limitation) of a long exposure?

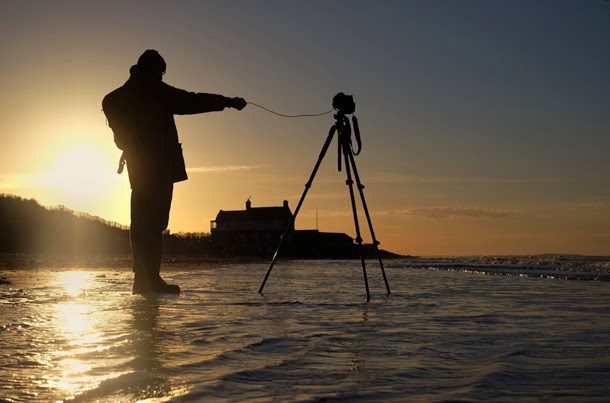
The most obvious drawback of a long exposure is being able to hold the camera steady enough and avoid any risk of camera shake ruining the shot by causing the things you want to remain solid and fixed within the scene to blur as well.
If your shutter speed is as slow as 1/30sec, there’s a real chance of camera shake; when the exposure lengthens to several seconds or more, camera shake is basically unavoidable if you are hand-holding. When it comes to shooting long exposures a sturdy tripod is definitely required.

When would I use a long exposure?

In low-light situations, such as shooting a sunrise or sunset, you may have little choice other than to choose a long exposure. While it’s possible to increase ISO to improve shutter speed, this isn’t always the best way.
Therefore, fixing the camera to your tripod and allowing it to expose for several seconds at a low ISO is unavoidable.
Long-exposure techniques have gained hugely in popularity over recent years, and many photographers now use light blocking filters so they can take long exposures even in bright conditions.

Dam Angore

Why would you deliberately want to shoot a long exposure?

This is purely for the creative effect it has on the outcome of the image. When exposures run into seconds or minutes, any moving subjects that are in the shot will become blurred.
How much they blur will depend on the speed they are moving at and how long the exposure is. You’ll see that moving water will take on a milky appearance, clouds will streak across the sky, wind-blown foliage will become fuzzy or a crowd of people on the street will blur.
While many photographers love these effects, there are others who hate them! Personally, I think that injecting a sense of movement into the right image can often make it look more interesting, but you need to be aware that the effect can also be overdone.
The real key is to combine something solid and fixed within the composition with the moving element. This is why coastal scenes with mooring posts or rocks around which water can blur are very popular with photographers.

Wednesday, 22 April 2015

How to make a digital infrared photo?

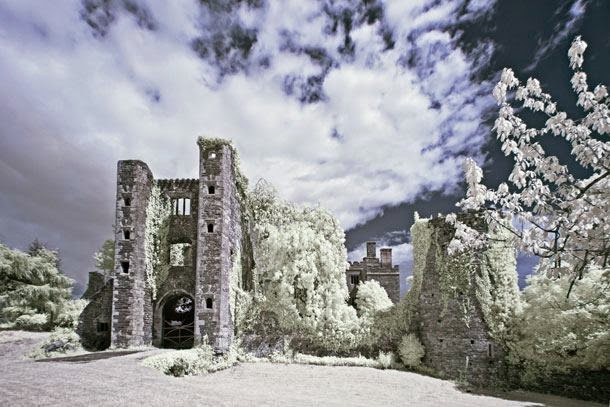
Infrared Landscape

Infrared photography can add a ghostly appearance to images shot on bright, sunny days. As a result it’s an effect that’s particularly suited to photos that feature Gothic architecture, castles, abandon buildings and ancient monuments. But it’s a technique that’s just at home with portraits and wildlife photography.
The majority of digital camera sensors include an infrared blocking filter for standard photography, and this needs to be removed in order to be able to take infrared pictures. Converting a camera to infrared like this means that you won’t be able to use it for regular full colour photography, so you’ll need to adapt a spare camera.
Not all of us happen to have an old digital SLR knocking around or the spare cash to convert it into an infrared camera. But there is an alternative: using an infrared filter. This screws onto the front of the lens and blocks all light bar infrared.
IR filters are very dark though, which means long exposure times – they’re useless for taking infrared photos of moving subjects.
You won’t be able to see anything through the viewfinder either, so it’s best to compose and manually focus before adding the filter. You’ll also need to spend a little time converting the image later.
If you don’t want to buy a filter, you can always learn how to add an infrared effect in Photoshop (Soon will be available). You can try this technique with any image, although if you take a photo with a fake infrared look in mind you’re more likely to end up with a successful result.

Tuesday, 14 April 2015

How to make a 360 degree polar panorama

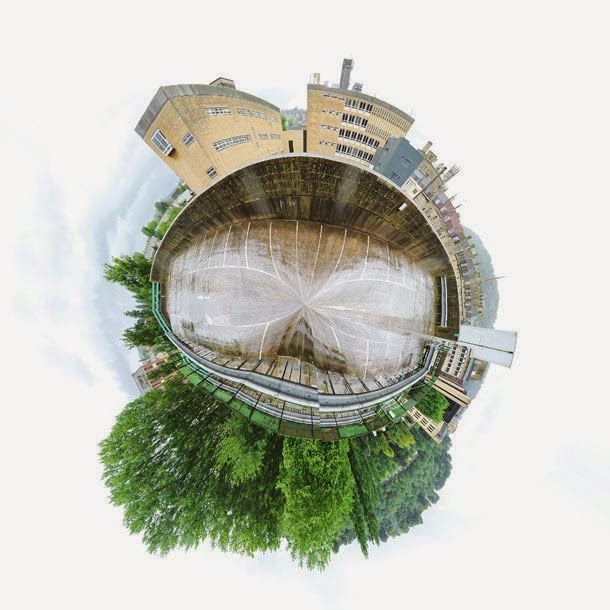
360_degree_Panorama

Polar panoramas are fun takes on the traditional panoramic ‘strip’. The principle is the same – take a sequence of images that you then stitch together in software – it’s just that you create a circular ‘world’ image at the final stage of the process.
As with other types of panoramic photography, you need a methodical approach to taking the individual frames. Take test shots of the brightest and darkest parts of the scene and work out the base exposure from these results. Use manual mode to set the aperture and shutter speed, and set the white balance and focus manually too, as this will ensure consistency across the sequence of pictures.
Make sure the tripod and head are level and, when you move the camera, allow for approximately 1/3 overlap between each frame. Shooting enough frames to cover a 360 degree image will mean your final panorama ‘globe’ won’t look stretched or have an obvious join.
Use panorama software such as Photoshop’s Photomerge option to stitch and blend the frames together. The next stage involves flipping the panorama photo vertically and resizing it to create a square image. To do this, use Image > Image Size in Photoshop. Make sure the ‘Constrain aspect ratio’ link box is unchecked and then change the width and height to the same value.

The final step is to use Filter > Distort > Polar Coordinates, selecting Rectangular to Polar in the dialog box that appears.

Sunday, 12 April 2015

How to make a Double Exposure Portrait Photo

Dual Exposure

Combining one photo with another isn’t a new technique: it’s been around since the late 19th century.
One of the most popular forms of double exposure photography is the combination of a portrait with a natural pattern. A strong texture tends to work best, whether it’s foliage, tree branches shot against a white sky or cracked earth.
Some DSLRs have a multiple exposure mode that enables you combine images in-camera. You can produce some quite striking images without resorting to Photoshop manipulation. Don’t believe us?

For a clean silhouette, you’ll need a white backdrop – getting low and photographing your portrait-sitter against a bright, cloudy sky is ideal. Do the same with the image you’ll be combining it with. Working in Live View mode is best, as you will be able to display the first image on the rear screen while you align the second. The two frames will then be automatically merged, with the texture being visible in the darker areas of the first image.

Not all cameras can take multiple exposures, in which case you’ll need to combine the photos in image editing software. Making a double exposure portrait in Photoshop (Lets see in another tutorials) is a simple process and one which provides an endless opportunity to fine-tune the blend between the portrait image and the texture.

Monday, 6 April 2015

How to make a DIY macro lens?


Macro lenses are brilliant optics, but you don’t need to spend much for one if you’re just a casual macro photographer. In our latest DIY Photography Tricks post we show you how to make a DIY macro lens using a simple cardboard tube…
If macro photography is your passion, spending a few Thousand rupees on a decent macro lens is a must. Altertnatively, you could get an extension tube or a close-up filter to enlarge your subject. But what if you want to get really close to your subject without the expense, perhaps just to try macro out?
It’s surprisingly easy to convert a standard lens into a macro, using nothing more than a cardboard tube, an old camera body cap and some tape…

How to make a DIY macro lens

01 Make a camera fitting
Start with a way to attach the lens to the camera. Find an old body cap. Drill a few holes on the inside, then use a small saw or a file to create an aperture in the middle.

02 Find a tube
We need distance between the sensor and lens to extend the focal length. Find a cardboard tube with roughly the same diameter as the body cap.

03 Prepare the tube
Cut the tube to about 15cm: this will vary depending on your lens you use, but it’s a good starting length. To stop light from bouncing around, stick black paper inside.

04 Fit the lens
Use insulation tape to stick the body cap inside the tube. With the front of the lens facing the tube, tape it in place so the end that usually fits onto the camera is exposed.

05 Set the aperture
On the back of the lens is a lever that camera uses to set the aperture. Position it so that the aperture is fully open and fix it with tape.
06 Start shooting!
In your camera’s menu, activate the setting that enables the camera to shoot without a lens. Fix the camera on a tripod, set to Manual and take a few test shots.
Final tip
When you shoot, you’ll need to adjust the shutter speed to get the correct exposure. To focus, change the camera’s distance from the subject.

Source: DIY Photography

9 creative photo ideas to try in April 2015

As part of our ongoing series to help you get more creative with your digital camera, each month we publish some fun, seasonal, creative photo ideas to help inspire your imagination. Along with some amazing images, we’ve also provided some quick photography tips by both amateur and professional photographers who are experts in these fields.
We’re introducing April with a new list of exciting photo projects like brooding landscapes, portraits of mothers and babies, creative forests and even selling your images!

Creative photo ideas for April: 01 Shoot brooding landscapes


Trying to come up with new ways of shooting landscapes is always a good idea. It’s all too easy to fall into clichés with the landscape genre, and rely too much on tried and tested techniques that produce rather predictable images.
Kartik Rawal went to the popular landscape Jungle of Sirohi-KalkaJi, but managed to come back with something very special indeed by shooting with an DSLR, then doing some creative experimentation afterwards in Photoshop.
Kartik, whose project on deserted roads has also attracted lots of attention, explains he has been taking pictures most of his life, but became a little more obsessive about it 10 years ago while filming a documentary for Surat city.
“Getting lost is half the fun,” says Kartik of his photographic travels.
Get started today
#1   Converting your camera to infrared can yield great results – but do bear in mind that it’s a very bold step to take, as the process cannot be reversed.
#2   “Once you have found the subject you wish to shoot, be aware of its surroundings – how do they interact with your subject?” says Kartik.
#3   Kartik points, you should think carefully about how light affects the subject. “Will waiting for the ‘right light’ helps you much? A different time of day maybe, if you’re lucky?”
#3   “Then use these elements to help build a narrative for the image,” Kartik adds. “These are the stepping stones that help the viewer navigate the image and hopefully make them come back and see something different on the second viewing.”