Tuesday 30 December 2014

Announcement...

With the Old year 2014 BYE! BYE! time and with your Cooperation for a year we have decided to give you New Year Gift of 2015.
Share It in Your Community/Social Media

We YPS Announce a Grand Photo Contest for our viewers.

With a Classic Topic i.e., Landscape.

In which all the interested can mail(ypsstudio@yahoo.in) their best photos to us, out of that Top 10 photos will be selected and will be displayed on our site and Social media’s while the winners photo is going to be displayed in our Studio.

And we pay sorry that as this being our first photo contest, we can’t give any awards or Certificates. If you support us with your max photo postings minimum 60-100 soon we’ll organize photo contests with certain awards.

Selection Categories

µ  Top 5 from our judges
µ  Second Top 5 from votes+comment

Rules for photoshow


Anyone can take part in photoshow from any country and area where from you can operate internet and mail us.

You can include Your Name tags, Copyright signs or etc. but the photo you are sending should strictly be yours.

 Mail us at- ypsstudio@yahoo.in

DEADLINE:  16th of JANUARY

Mail with your
o   Name
o   Caption of Image
o   Place

 Photo can be of any size(Max: 5MB) or resolution. We will accept your Mobile/Smartphone photos, CSC’s, DSLR’s, etc.

All the Uploaders are requested to share this news in your community so that you may get more +1’s.

 It’s like Voting i.e., one person one photo.

All the photos receiving will be posted on our site and social sites.

But votes will be taken only from our sites which include Google+, Facebook (Y), and Twitter (@YPSStudio).

By sending your Photo to us, you give us allowance that we can use it for our sites.

And we give you assurance that we will not misuse your photos

By agreeing all this requirements send your photos.

We Hope that You all will support us for making this photo contest hit...

Monday 29 December 2014

Be connected with us every time

Be Connected

Facebook
Give a (y) Like
www.facebook.com/ypsstudio

Twitter
Follow Us
twitter.com/YPSStudio

InstagramINSTAGRAM
Follow Us
instagram.com/ypsstudio

Soon we will meet u on other social sites...... :-)
Please Support us
#follow_for_Followback

How to get your pictures featured in the best photography magazines

How to get your pictures featured in the best photography magazines

Digital Camera World is the official website of Digital Camera magazine, the best-selling photography magazine in the UK. But now it’s also the home to more of the world’s best photography magazines than ever before!
N-Photo is the UK’s best-loved Nikon magazine, while PhotoPlus is the only photography mag for Canon photographers available in stores.
And finally there’s Practical Photoshop, the essential monthly read if you want to improve your photo editing and learn new image manipulation skills.
The editors are always on the lookout for exciting new photographers to feature on the pages of these magazines, but what’s the best way to approach them and get your pictures published? Here are our 5 top tips:

1. Make a speculative magazine submission by email


The days of sending in a CD and a contact sheet to a magazine are long gone. An initial submission of 5-10 low resolution JPEGs by email, along with a link to your online gallery is the way to get noticed by a time-strapped magazine editor.
Make sure the photos are low res (72 dpi) and not full size – consider something in the order of 1200 pixels along the longest length as a good starting point.
Obviously it goes without saying that you should be able to lay your hands on the high resolution file without any trouble. You may be surprised to hear that this isn’t always the case!
Don’t be too concerned if you don’t hear back from the magazine immediately. The team could be on deadline when your submission hits their email inbox, and they’ll have other priorities, such as making sure the next edition of your favorite photography magazine gets out of the door.
A follow-up email 1-2 weeks later to check that your photos arrived is more than acceptable, though.

2. Make regular submissions


Photo magazines receive speculative submissions from photographers daily, so don’t be surprised if your first set of pictures isn’t selected.
It doesn’t mean you should give up. There could be any number of reasons why the team couldn’t feature your pictures.
For instance, a photo may be artistically and technically superb, but if the magazine has only recently printed a similar style of shot them it’s unlikely to want to print another shortly afterwards.
Your photos may not be timely enough, either. Magazine teams do keep a note of photographers whose pictures may not fit into the current issue, so it may be worth a punt if you believe your picture edges one that’s already been printed.
But there’s little point in sending an editor, an autumn or fall picture in December, because the team will be working on their winter and spring issues.
Being persistent without being pushy is key. Be upfront if you’ve sent your photos to another photography magazine, too.
Photography magazine editors are unlikely to feature your pictures again if they end up publishing an identical image as another photography magazine in the same month.

3. Make sure your photos cut it technically


Photo magazine editors are looking for original images that capture a moment, evoke a response or illustrate a photographic concept or technique. But they need those photos to be technically top-drawer too.
Be honest with yourself: is the image sharp (if indeed it’s supposed to be sharp), properly exposed and processed with care?
Pixel peeping often gets a bad press, but it’s the best thing to do when you want to get your photo featured in a photography magazine. View your images at 100% and check them thoroughly, as that’s exactly what the magazine’s designers and editors will do.
When it comes to file size, the bigger the better. Photography magazines are typically A4 in size, and a portrait-format image, printed at full-page size should be 30cm high at a resolution of 300 dpi.
A landscape-format image should ideally be 45cm wide, which will enable the magazine’s art editor to use the image ‘full bleed’ across a magazine spread should they need to.
Don’t be disheartened if your digital camera doesn’t produce images large enough to meet these size requirements.
If your picture is good enough, the magazine team can often make slight design changes or lower the resolution slightly in order to hit the required print size. And besides, not all images are printed full bleed anyway.
However, this is another good reason for getting a picture right in camera. If you routinely crop your images, then this will reduce the size at which they can be printed.
If you’re packing a high-resolution DSLR like the Nikon D810, then you’ll obviously have more room to play with, but it’s something to be aware of if you shoot with a comparatively low-res camera.

4. Leave room for text on your photos


Magazine teams aren’t just looking for perfectly framed pictures, they’re also looking for images that work within the framework of page layouts.
For instance, if you want to see your photo on the cover of a magazine, then you’re going to have to leave some clear space for the magazine’s art editor to drop in the logo and cover lines.
It’s a similar consideration when it comes to the opening ‘dps’ (double page spread) of a magazine feature – is there some ‘dead space’ to drop in the title of the article along with some copy?
At first it feels unnatural, having to reframe your tightly composed shot to include excessive space. But it doesn’t take much effort to fire off one or two of these looser compositions when you’ve got the original shot in the bag – and it could increase the chances of your pictures being featured.

5. Offer something more than just your best photo


To increase the chances of your pictures being featured, consider how you offer additional value to the magazine editor.
As well as finding glorious pictures for reader gallery sections, editors and designers are always on the lookout for images that can be used to illustrate photography technique articles. Would your photos be a good fit?
Deliberately shooting ‘wrong’ versions of a picture, as well as the ‘correct’ one can be useful. For example, if you have a great photo of a landscape taken with a ND grad filter, can you supply versions of the same shot without the filter in place?
How about before/after shots showing any photo editing or photo manipulation you’ve carried out?
Magazine editors are likely to be interested in interesting photo stories too. Do you have a small portfolio of pictures that tells an interesting story in an interesting way?
Don’t overlook other sections of the magazine that feature reader pictures, such as PhotoPlus magazine’s Your Photos or Apprentice sections or N-Photo’s ‘Over to you’ regular.
If you’re new to photography, why not send your pictures into Digital Camera magazine’s ‘Rate my photo’ and get some expert feedback on your pictures.

How to contact the world’s best photography magazines:

Digital Camera magazine

Email: digitalcamera@futurenet.com
Facebook: 
www.facebook.com/Digitalcameraworld
Twitter: 
twitter.com/dcammag

PhotoPlus magazine

Email: photoplus@futurenet.com
Facebook: 
www.facebook.com/PhotoPlusMag
Twitter: 
twitter.com/photoplusmag

N-Photo magazine

Email: nphoto@futurenet.com
Facebook: 
www.facebook.com/NPhotomag
Twitter: 
twitter.com/nphotomag

Practical Photoshop magazine
Email: practicalphotoshop@futurenet.com
Facebook: 

Email: practicalphotoshop@futurenet.com
Facebook: 
www.facebook.com/practicalphotoshop
Twitter: 
twitter.com/pracphotoshop

Friday 26 December 2014

Coming Sooon...!!

Soon! Soon! Soon.......!!
You will Be taken to my New Tours of Winters at the Varied Places of Sirohi.....
with the inclusion of

  • New Models,
  • Faces,
  • Things,
  • Place &
  • off-course Poses &
  • some sort of New Edit
With all new Fashion Freakers we are on the #Shoots, for the whole Winter 'Busy'
Wannna Go... Come....!!

Tuesday 23 December 2014

6 black and white photography tips for serious mono enthusiasts

Thanks to digital technology, monochrome photography is easier than ever before. In their latest guest blog post the team at Photoventure offer these six black and white photography tips for getting great results.
1. Shoot raw and JPEG

The best monochrome conversions are made by editing raw files which have the full colour information, but if you shoot raw and JPEG files simultaneously and set the camera to its monochrome Picture Style/Picture Control/Film Simulation mode you get an indication of how the image will look in black and white.
As many photographers struggle to visualise a scene in black and white, these monochrome modes are an invaluable tool that will help with composition and scene assessment.
Many cameras are also capable of producing decent in-camera monochrome images these days and it’s worth experimenting with image parameters (usually contrast, sharpness, filter effects and toning) to find a look that you like.
Because compact system cameras and compact cameras show the scene seen by the sensor with camera settings applied, users of these cameras are able to preview the monochrome image in the electronic viewfinder or on rear screen before taking the shot.
DSLR users can also do this if they activate their camera’s live view system, but the usually slower responses mean that many will find it preferable or check the image on the screen post-capture.

2. Look for contrast, shape and texture

The complimentary and opposing colours that bring a colour image to life are all reduced to black and white or shades of grey in a monochrome image and you have to look for tonal contrast to make a shot stand out.
In colour photography, for example, your eye would immediately be drawn to a red object on a green background, but in monochrome photography these two areas are likely to have the same brightness, so the image looks flat and dull straight from the camera.
Fortunately, it’s possible to work adjust the brightness of these two colours separately to introduce some contrast (see Take control in upcoming post for more information). However, a good starting point is to look for scenes with tonal contrast.
There are always exceptions, but as a general rule look for scenes that contain some strong blacks and whites.
This can be achieved by the light or by the brightness (or tone) of the objects in the scene as well as the exposure settings that you use.
The brightness of the bark of a silver birch tree for example, could inject some contrast (and interest) in to a woodland scene.
Setting the exposure for these brighter areas also makes the shadows darker, so the highlights stand out even more.
Look for shapes, patterns and textures in a scene and move around to find the best composition.

3. Try long exposure

Long exposure shots can work really well in monochrome photography, especially where there’s moving water or clouds.
During the exposure the highlights of the water, for example, are recorded across a wider area than they would with a short exposure and this can help enhance tonal contrast.
The blurring of the movement also adds textural contrast with any solid objects in the frame.
If necessary, use a neutral density filter such as Lee Filters’ Big Stopper or Little Stopper to reduce exposure and extend shutter speed (by 10 and 4 stops respectively).
Naturally, when exposures extend beyond about 1/60 sec a tripod is required to keep the camera still and avoid blurring.
It’s also advisable to use a remote release and mirror lock-up to minimise vibration and produce super-sharp images.

4. Use filters

Graduated neutral density (AKA ND grad) and polarising filters are just as useful in monochrome photography as they are in colour.
In fact, because they manipulate image contrast they are arguably more useful.
An ND grad is helpful when you want to retain detail in a bright sky while a polarising filter can be used to reduce reflections and boost contrast.
Alternatively, consider taking two or more shots with different exposures to create a high dynamic range (HDR) composite.
Don’t be afraid to use a ND grad with a standard neural density filter if the sky is brighter than the foreground in a long exposure shot.
Coloured filters, which are an essential tool for monochrome film photographers, can also be useful for manipulating contrast in digital images.
They work by darkening objects of their opposite colour while lightening objects of their own.
An orange filter, for example, will darken the blue of the sky while a green one will lighten foliage.

5. Take control

Although coloured filters can still be used to manipulate contrast when shooting digital black and white images, it’s more common to save this work until the processing stage.
Until a few years ago Photoshop’s Channel Mixer was the preferred means of turning colour images monochrome, but now Adobe Camera Raw has more powerful tools (in the HSL/Grayscale tab) that allow you to adjust the brightness of eight individual colours that make up the image.
It’s possible to adjust one of these colours to make it anything from white to black with the sliding control.
However, it’s important to keep an eye on the whole image when adjusting a particular colour as subtle gradations can become unnatural looking.
And adjusting the brightness of a red or pink shirt with the red sliding control, for instance, will have an impact on the model’s skin, especially the lips.
The Levels and Curves controls can also be used to manipulate tonal range and contrast, but the HSL/Grayscale controls allow you to create separation between objects of the same brightness but with different colours.

6. Dodge and burn

Dodging and burning is a technique that comes from the traditional darkroom and is usually used to burn in or darken highlights and hold back (brighten) shadows.
Photoshop’s Dodge and Burn tools allow a level of control that film photographers could only dream of because you can target the highlights, shadows or mid-tones with both.
This means that you can use the Burn tool to darken highlights when they are too bright, or the Dodge tool to brighten them to increase local contrast.
It’s a great way of giving a sense of greater sharpness and enhancing texture.
Plus, because you can set the opacity of the tools, you can build up their effect gradually so the impact is subtle and there are no hard edges.

Abstract photography: how to capture reflections in oil and water

In this quick tutorial we show you how to create amazing abstract images by photographing reflections in oil and water.
Something as simple as oil in water can make an amazing subject for eye-catching abstracts. Place a see-through template in front of a light and you can turn a simple shape into something much more creative, as that shape is reflected in every little globe of oil.
Here, we’ve chosen a smiley face as the ‘shape’ for our finished image, but what makes this project so appealing is that you can use any shape (hearts, flowers, stars) or light source you like. It’s ideal for a quick home photo project, and the results can be spectacular. Here’s how it’s done…
How to photograph still life reflections
01 Make a template

Make a template, using a sheet of coloured film as a base. Position your template in front of your light source, angled downwards. Make sure it isn’t too close to the bulb, and turn the light off when not shooting. Set your camera to Manual and your lens to Manual focus.

02 Add some oil

Set up your light, tray and template as shown here. Position your camera opposite the light. Focus on a spot first, then drip more oil onto it for clusters of droplets. Select the aperture you want for the required depth of field (f/8 is good) and the shutter speed, and shoot.

03 Boost the colors

Once you have downloaded the images to your computer, open them in Adobe Camera Raw or a similar RAW processer, then use the sliders to boost colour saturation and contrast, and darken the blacks. You could try combining more than one frame in Photoshop.

8 creative photo ideas to try in December

As part of our ongoing series to help you get more creative with your digital camera, each month we publish some fun, seasonal, creative photo ideas to help inspire your imagination. Along with some amazing images, we’ve also provided some quick photography tips by both amateur and professional photographers who are experts in these fields.
We’re kicking off December with a new list of exciting projects like making a naturalistic portrait, creative still-life photo ideas, film effects in Lightroom and many more.

Creative photo ideas for December: 01 Make naturalistic portraits 
Model: Tanay Ojha
Camera: D50
Shooting a good portrait is a challenge in itself, but the work doesn’t stop there. How you finish the image is important too. Skilful retouching in Photoshop or Lightroom can make a good portrait great.
LA-based fine-art photographer Jessica Drossin has some useful tips through her experience in this field.
“The key to creating a great portrait is capturing the subject’s personality while documenting their appearance in a flattering and interesting way,” she explains.
“To ensure that the focus is where it belongs, decrease the saturation of a bright background object, blur unimportant details, and clone out distracting elements.”
When it comes to retouching the face, Jessica insists that subtlety is all. “I like to reduce the appearance of pores, soften any discolouration under the eyes, and clone out any stray hairs from the face. Resist the temptation to get carried away – plastic skin and glowing eyes will distract, and all anyone will notice is your retouching.”
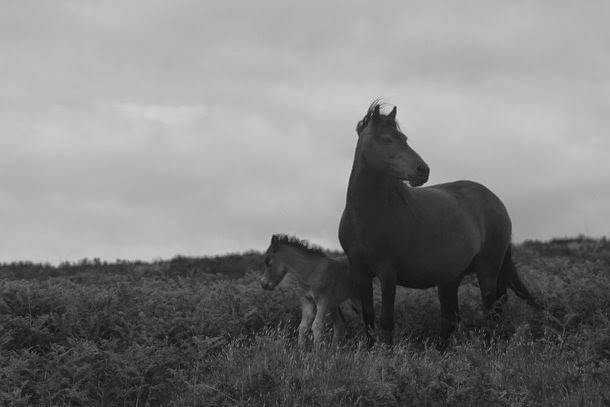
Jessica is clear that getting the right colours (when you’re not shooting in mono, like the shot from Jessica shown here) is also important.
“Your colour choices do a lot to determine the mood of your portrait. Warm tones will imply happiness and health, while cooler tones will create a moodier, more complicated interpretation of your subject.
Adjusting colours can help to pull an image together, creating an overall consistency of tone.
For most portraits, I recommend increasing the saturation of skin tones to add more vibrancy. But be careful not to overdo it.”
Get started today
* A wide-aperture lens is essential to capture blur out distracting backgrounds.
* Use single-point AF and carefully set the AF point over the eyes.
Experiment with crops in Photoshop to make your compositions even stronger.

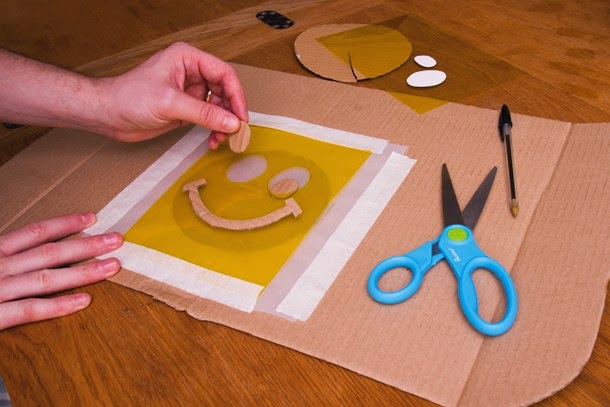
Creative photo ideas for December: 02 Start a creative still-life project

Late autumn and winter means inclement weather and increasingly short days, so why not try some creative photography indoors?
There’s more to this type of photography than shooting water droplets, though. If you’re seeking some creative inspiration, check out the work of Dina Belenko on 500px
Dina describes her work as photo illustration, but she is schooled in the traditional disciplines of still-life photography.
“A great place to start is with a sparkler,” she explains. “Expose it for about a second or half a second, depending on the scale of the scene, and you can get beautiful fiery trails.
“In the image here, I stuck a sparkler on a plate with Plasticine, then introduced other elements. I moved the glass and chocolates closer to the sparkler, so the sparks could bounce off them. After that I placed the camera on a tripod, set the shutter speed to 1.3 seconds and lit the sparkler. It burns for quite a long time.”
Dina is also a big fan of smoke in still-life photography. “All you need is a dark background, a backlight, and incense sticks. Lots of them. They are much cheaper than a fog machine, more accessible than dry ice, and safer than an open flame.
“For my ‘Betelgeuse Travel Corp’ image, I used about 15 incense sticks. I covered the bottom of a suitcase with foil to protect it from hot ashes, inserted an LED lamp and lit the sticks. For my‘Voices’ image, I used just one stick, and placed it on the bottom of a miniature telephone box, so that the smoke could rise right inside it.”
Get started today
Smoke effects look mysterious and beautiful, but it’s best to work in a well-ventilated room!
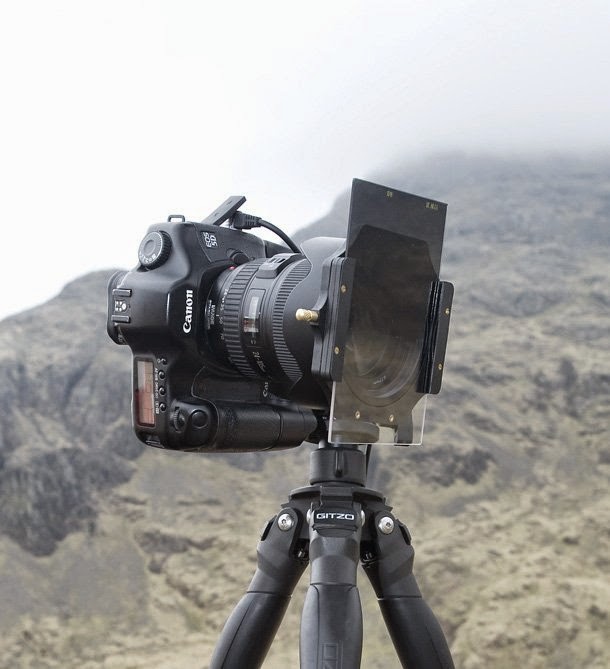
* Lots of these techniques involve slow shutter speeds, so a tripod and remote release are essential. If that seems a bit cumbersome, try a compact camera support such as the Joby Gorillapod.
* Dina is also a wizard at making sugar look like snow. Powdered sugar or flour gives a nice snowfall effect, she says. “You can even make a real blizzard, if you sprinkle it forcefully enough and choose and the right shutter speed.”
* Dina is also famous for her images of splashing coffee or other tinted liquids, for which she uses a syringe and a flashgun, and applies a fast shutter speed.

Creative photo ideas for December: 03 Make a photo mosaic

Photo by Danish Photographer: Andreas Olesen

There’s more to panoramic photography than yet another long thin shot of Durdle Door. Danish photographer Andreas Olesen has won critical acclaim for his enigmatic ‘Superposition’ project, which he has been working on for nearly 12 years.
“It started when I was given an Olympus PEN D half-frame camera by a friend, and I began making panoramic landscape images with three-to-five frames per image,” he says.
“I was really attracted to the aesthetic of panoramas composed of several frames, and I had my first solo show in 2006 with those images.
“Then I started to think about the interesting aspects of the format over a single-frame image, and I realised that there was the perfect chance to play with ideas about time in photography, as well as expanding the scope of the image to include more frames.
“I bought an old PEN F half-frame SLR and an adaptor so I could use my Nikon lenses, which would give me the ability to construct much larger images.”
Get started today
* Andreas uses a film camera, but his multi-frame technique can work just as well with digital technology.
* Andreas draws inspiration from the aesthetic of the negative. “The black images between the frames are the actual blank space between shots on the roll of film. Each image is titled with the amount of time there is between the different shots that make up the image.” Why not arrange your images on grids in Photoshop to see if you can achieve a similar effect?
* This kind of fine-art project takes patience and perseverance. “It comes down to constantly honing your craft, and you need to get used to rejection too, especially when approaching galleries or image buyers.”

Creative photo ideas for December: 04 Try gig photography


Gigs and other kinds of musical events can generate great images all year round.
If you can’t get a photo pass, don’t despair: many venues and artists still allow you to shoot with compact cameras and sometimes even DSLRs, so it’s still possible to get good shots at gigs and events while you’re back in the crowd.
A compact with a long built-in lens is essential, but whatever camera you use, you’ll need to be discrete and work quickly. Be careful not to annoy other people – especially the performers.
Get started today
* Long lenses help you to isolate the performers from waving hands from the crowd and stage clutter.
Image stabilisation is a must when you’re shooting at longer focal lengths, in order to minimise camera shake.
* The light at gigs and events can change constantly, but it will be poor generally, so choose a wide aperture (f/2.8 is ideal, if available) to let in lots of light.
* If you’re not close enough to use flash (or you’re not allowed to use it), you’ll normally need to set a high ISO, which also gives faster shutter speeds.
* Accurate focusing is important. For the shot above, Digital Camera magazine’s deputy art editor 
Shona Cutt used Continuous/AI Servo AF, keeping the AF points trained on the face.

Creative photo ideas for December: 05 Emulate film with Lightroom presets


As any wedding photographer will tell you, getting the ‘film’ look in portraits is all the rage at the moment – but it’s not just about wedding images.
We’ve entered a post-Instagram age, where adding a retro look to a photo is no longer enough. There’s now a big demand for sophisticated Lightroom presets and Photoshop Actions that emulate the look of classic film and scanners.
It’s not hard to understand why. Until digital came along, some truly wonderful film stock was being made. One thinks of Kodachrome, loved by Steve McCurry, or Velvia, a big hit with landscape photographers.
With presets, you can have the best of both worlds: the potentially rich tones of film and the convenience of digital.
Lightroom presets are particularly easy to use. All you need to do is drop them into the Develop Presets folder, then restart Lightroom. You then get a quick one-click fix that can significantly reduce your image-processing time and help to keep your stylistic images consistent.
As well as commercially sold presets, you can get some good free ones at www.presetsheaven.com and www.ononesoftware.com.

Creative photo ideas for December: 06 Shoot traffic trails


Winter nights can seem boring for the keen photographer, but here’s a great technique to try all year round. Use a long exposure to get cool traffic trail effects when cars drive by.
It’s one of those techniques that is very hard to get on a smartphone and a pain to replicate in software, so it will mark you out as a skilled photographer. Actually, traffic trails are not that hard to take, but you do need to prepare carefully.
First, find a suitable (but safe) location. Try standing by a busy junction controlled by traffic lights, or a slip road or a roundabout, where you’ll get vehicles coming past at different speeds.
Capturing vehicles when they are turning can create interesting effects too. You’re using a slow shutter speed, so you need a tripod and cable release to keep the background sharp.

Creative photo ideas for December: 07 Be inspired by the Royal Photographic Society


The Royal Photographic Society of the UK is the oldest photographic society in the world, and possesses an unrivalled collection of historic photographs and artefacts.
We’re talking over 250,000 images, 8,000 items of photographic equipment and 31,000 books, periodicals and documents.
The cream of this collection, set up at the behest of Queen Victoria’s consort Prince Albert, is to go on show in early December at the Science Museum in central London.
This unique and historic exhibition features some of the earliest known images, dating back to the 1820s, by pioneers of photography such as Roger Fenton, William Henry Fox Talbot and Julia Margaret Cameron, alongside contemporary works by Don McCullin, Terry O’Neill, Martin Parr and other modern greats.
That’s over 150 years of photography inspiration under one roof. If you only go to one show this winter, make it this one!
Get involved today
* The exhibition is called 
Drawn by Light, and opens at the Media Space in London’s Science Museum on 2nd December. It will run until 3rd March next year, and tickets cost £8. Full details are at www.sciencemuseum.org.uk.
* There’s so much inspiration to be had from the images, that it’s hard to know where to start, but what’s particularly interesting is how photography found its own voice in the 19th century, and emerged as an art form in its own right as the technology improved – rather than being the poor relation of painting.
* A purely technical analysis of the images on display rather misses the point (the best photographs are always greater than the sum of their parts), but it’s worth paying particular attention to composition. There will be nothing in the frame ‘by accident,’ that ends up unintentionally distracting you – so think about how you can apply this core principle to your photography. Notice too how often many great photographers ‘break the rules’.

Creative photo ideas for December: 08 Freshen up your food photography


Great food photography isn’t just about capturing mouth-watering shots of an elaborate banquet: it can encompass many different types of food imagery, including fast food and the increasingly fashionable street food.
Then there is food and restaurant culture, how food is prepared and served, the people who produce food and so on. Really, there are as many different types of food photography as there are cuisines.
That said, as with all photography, it helps if you have some kind of connection with your subject. Maybe you are friends with the chef or farmer, love the restaurant or love that particular type of street food.
Many of the principles of portrait photography apply to food. You need to get close enough to the subject, and carefully set the focus where you want it to be.
Shooting with wide apertures helps, as it helps blur out distracting backgrounds and comes in useful in the low light of a restaurant.

Get started today
* It’s fine to use flash, but make sure the light is not overpowering or unnatural. Off-camera flash and studio lights make food look great.
* There are various ways to make food look appetising; cooking it will help, as the steam can make it look tastier. Squirt a little water on fruit or vegetables to make them look fresher.