Showing posts with label Photoshop. Show all posts

Friday, 2 October 2015

7 Daily Exercise for PHOTOGRAPHERS

7. Post a single image every day

Rather that shooting in a sporadic fashion and positing images to Facebook, Twitter, Flickr, Instagram or any other social networking or image sharing site as and when you feel like it, try committing to shooting at least one image and posting only one shot every day.
This will encourage your powers of creativity, helping you to find novel subjects and explore new areas or genres of photography.
It will also mean that you have to critically assess each image to identify the best shot from that day to post.
Wherever you post your image, make it known what you are doing as this will underline your commitment.

It’s also often a good idea to request constructive criticism to help you see your shots from another viewpoint and improve as a photographer.
NPhoto Magazine

PhotoPlus Magazie

To Be Continued....

Thursday, 1 October 2015

7 Daily Exercise for PHOTOGRAPHERS

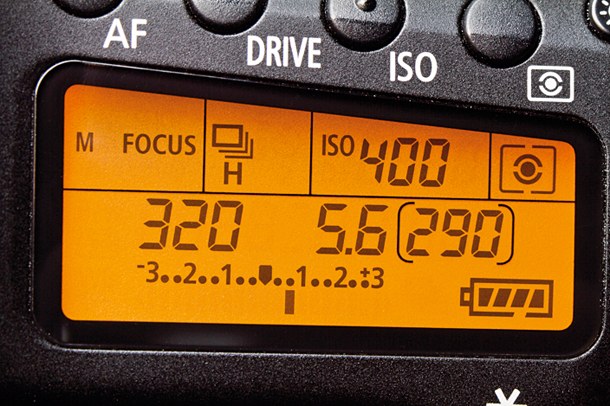
6. Use manual exposure mode

Although aperture and shutter priority exposure modes are very useful, they leave the decision about how bright or dark the image will appear to the camera.Manual exposure mode puts you in charge and it forces you to think about the brightness of a subject and its surroundings. It also means that you have to consider both depth of field and freezing or blurring movement.It can be helpful to combine this exercise with using spot metering as it will enable you set select exposure settings that work for a specific part of the scene.
Manual Mode

To Be Continued....

Wednesday, 30 September 2015

7 Daily Exercise for PHOTOGRAPHERS

5. Set a custom white balance value

It’s easy to set the custom white balance value of a camera, you just set it to the correct mode (the manual will explain how to find this) and then photograph a white or neutral grey card in the same light as your subject. Well that’s the theory.
In practice it can be little trickier, because the angle at which you hold the card can have a huge impact upon the final result.
If the main light is coming from directly above your subject, for example, and you tip the card slightly downwards towards a coloured area under your subject you will find the result is very different to the one you get if you hold the card slightly tipped upwards.
Learn how to make a custom white balance setting with your camera and experiment by holding a white balance card at different angles to see for yourself and learn.

If you find you don’t like the neutral look of images that your camera produces in this mode, try the adjustment controls until you find a setting that works for you.
Custom White Balance

To Be Continued....

Tuesday, 29 September 2015

7 Daily Exercise for PHOTOGRAPHERS

4. Set a specific white balance

Modern automatic white balance systems are extremely capable, but that’s not always a good thing because it can mean that you shoot with your mind in neutral (ha!) as far as colour goes.
This may be fine much of the time, but if the camera delivers a result that you don’t like, you may find yourself a little stuck for answers.
The answer is to climb free of the auto white balance safety-net and set a preset white balance value for the appropriate lighting conditions.

You may find that the Daylight or Sunny white balance setting produces the best results for the majority of the time, but it’s worth experimenting with the others to assess their impact in a range of conditions so that you know when to use them in the future.
Set The White Balance

To Be Continued....

Sunday, 27 September 2015

7 Daily Exercise for PHOTOGRAPHERS

2. Check the histogram

Just like the Levels display in image editing software packages such as Adobe Photoshop, a camera’s histogram display is a graph that represents the brightness of the pixels that make up an image.
The scale runs from black, with a brightness reading of 0, on the left to white, with a brightness reading of 255, on the right.
The peaks in the histogram indicate the number of pixels with that brightness and a large peak means lots of pixels have that brightness.
This means that a very dark image will have peaks over to the left of the graph, while a bright one has peaks on the right.
Meanwhile, a correctly exposed ‘ideal’ scene has a histogram with a so-called ‘normal’ distribution with a peak in the middle and just a few very bright and very dark pixels.
Checking the histogram after every shot will increase your understanding of the brightness distribution of an image.
It will also enable you to determine whether an image is under- or over-exposed with the majority of pixels being grouped to the left or right of the graph respectively.
Check the HISTOGRAM


To Be Continued....

Wednesday, 22 April 2015

How to make a digital infrared photo?

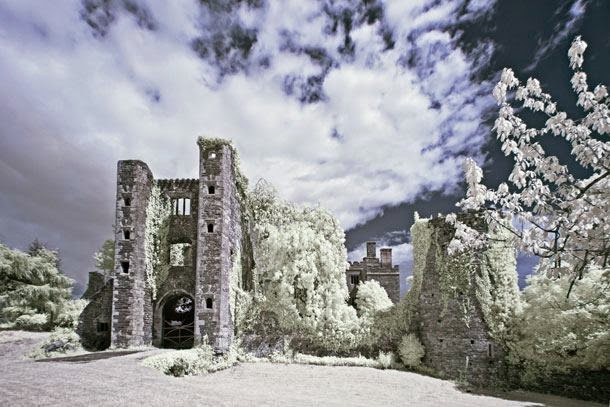
Infrared Landscape

Infrared photography can add a ghostly appearance to images shot on bright, sunny days. As a result it’s an effect that’s particularly suited to photos that feature Gothic architecture, castles, abandon buildings and ancient monuments. But it’s a technique that’s just at home with portraits and wildlife photography.
The majority of digital camera sensors include an infrared blocking filter for standard photography, and this needs to be removed in order to be able to take infrared pictures. Converting a camera to infrared like this means that you won’t be able to use it for regular full colour photography, so you’ll need to adapt a spare camera.
Not all of us happen to have an old digital SLR knocking around or the spare cash to convert it into an infrared camera. But there is an alternative: using an infrared filter. This screws onto the front of the lens and blocks all light bar infrared.
IR filters are very dark though, which means long exposure times – they’re useless for taking infrared photos of moving subjects.
You won’t be able to see anything through the viewfinder either, so it’s best to compose and manually focus before adding the filter. You’ll also need to spend a little time converting the image later.
If you don’t want to buy a filter, you can always learn how to add an infrared effect in Photoshop (Soon will be available). You can try this technique with any image, although if you take a photo with a fake infrared look in mind you’re more likely to end up with a successful result.

Tuesday, 14 April 2015

How to make a 360 degree polar panorama

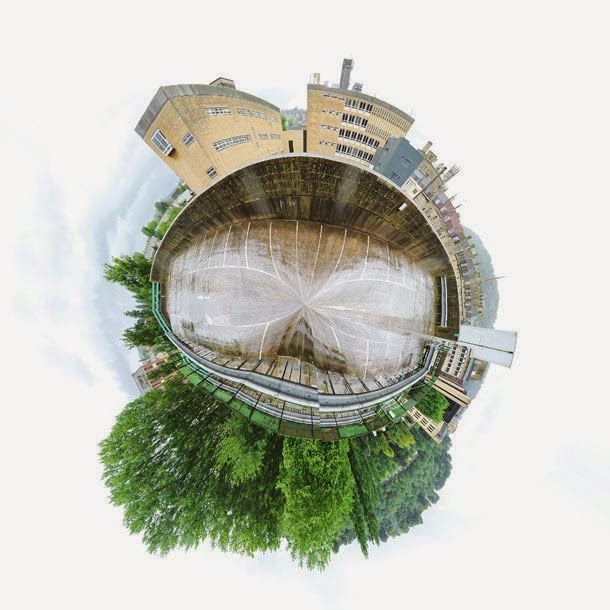
360_degree_Panorama

Polar panoramas are fun takes on the traditional panoramic ‘strip’. The principle is the same – take a sequence of images that you then stitch together in software – it’s just that you create a circular ‘world’ image at the final stage of the process.
As with other types of panoramic photography, you need a methodical approach to taking the individual frames. Take test shots of the brightest and darkest parts of the scene and work out the base exposure from these results. Use manual mode to set the aperture and shutter speed, and set the white balance and focus manually too, as this will ensure consistency across the sequence of pictures.
Make sure the tripod and head are level and, when you move the camera, allow for approximately 1/3 overlap between each frame. Shooting enough frames to cover a 360 degree image will mean your final panorama ‘globe’ won’t look stretched or have an obvious join.
Use panorama software such as Photoshop’s Photomerge option to stitch and blend the frames together. The next stage involves flipping the panorama photo vertically and resizing it to create a square image. To do this, use Image > Image Size in Photoshop. Make sure the ‘Constrain aspect ratio’ link box is unchecked and then change the width and height to the same value.

The final step is to use Filter > Distort > Polar Coordinates, selecting Rectangular to Polar in the dialog box that appears.

Sunday, 12 April 2015

How to make a Double Exposure Portrait Photo

Dual Exposure

Combining one photo with another isn’t a new technique: it’s been around since the late 19th century.
One of the most popular forms of double exposure photography is the combination of a portrait with a natural pattern. A strong texture tends to work best, whether it’s foliage, tree branches shot against a white sky or cracked earth.
Some DSLRs have a multiple exposure mode that enables you combine images in-camera. You can produce some quite striking images without resorting to Photoshop manipulation. Don’t believe us?

For a clean silhouette, you’ll need a white backdrop – getting low and photographing your portrait-sitter against a bright, cloudy sky is ideal. Do the same with the image you’ll be combining it with. Working in Live View mode is best, as you will be able to display the first image on the rear screen while you align the second. The two frames will then be automatically merged, with the texture being visible in the darker areas of the first image.

Not all cameras can take multiple exposures, in which case you’ll need to combine the photos in image editing software. Making a double exposure portrait in Photoshop (Lets see in another tutorials) is a simple process and one which provides an endless opportunity to fine-tune the blend between the portrait image and the texture.

Saturday, 14 March 2015

Thursday, 1 January 2015

Happy New Year- 2015

..........2015.........
Happy New Year

Wishing u all a    #Prosperous    #Healthy    #Thrillng    #Adventures    & a      #Best    #Photographic_Year    ahead


Special: Works of Phgr. Kartik Rawal

Celebrate your New Year with a #Landscape_Contest

#take part in Contest
Mail us @ ypsstudio@yahoo.in