Showing posts with label lens. Show all posts

Wednesday, 13 January 2016

SIROHI EXPEDITION

New Photo Story Revealed on SIROHI city an identified-unidentified place of History
is now revealed through our Lens, very proud to do that
Glimpses on History of Sirohi
  • Its name came from the swords as SIROHI is the Synonym of SWORD(in Hindi).
  • It was known for its brave and powerful local tribe - Rabari's .
  • Its Sword was the best and powerful sword available in its time.
  • Akbar also took many craftsmen to Agra to make the best Swords for him and also the Swords.
  • Its flag contains 5 Colours.


Just get there and let me know some suggestions, if any.

Late Sooner the Video version will be available

Monday, 28 September 2015

7 Daily Exercise for PHOTOGRAPHERS

3. Use a single prime lens

Using a prime, or fixed focal length, lens enables you to forget about the distraction of zooming in and out.
Instead you walk towards a subject, assess it through the viewfinder and then either shoot or move again to find a new or alternative vantage point.
It forces you to explore the subject more fully you’ll soon get a better understanding of the angle of view of the lens.

As well as letting you travel light, if you take just one lens with you on a shoot, or day out with your camera, you’ll really get to know that focal length and in the future you’ll be able to decide which lens to mount on your camera just by looking at the scene and framing an image in your mind.
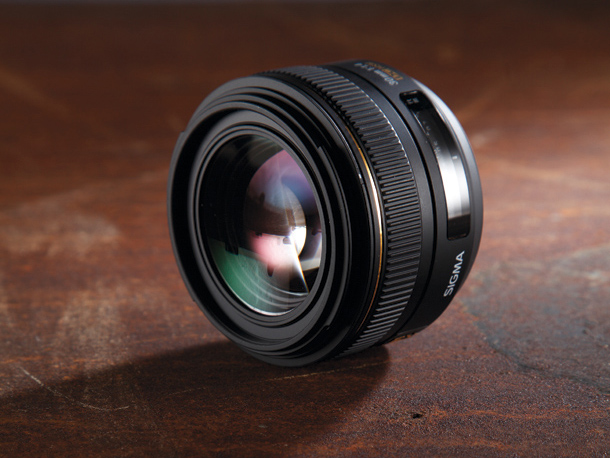
Sigma Prime Lens

To Be Continued....

Wednesday, 22 April 2015

How to make a digital infrared photo?

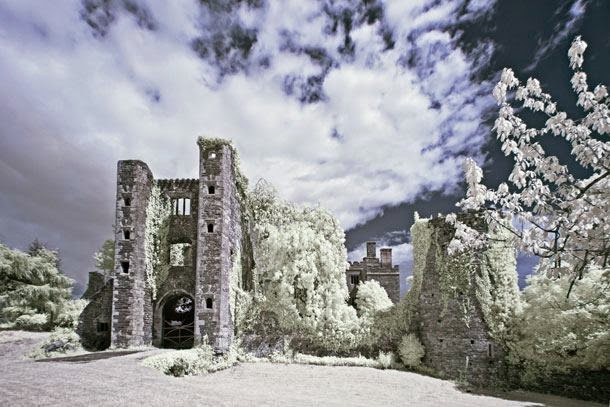
Infrared Landscape

Infrared photography can add a ghostly appearance to images shot on bright, sunny days. As a result it’s an effect that’s particularly suited to photos that feature Gothic architecture, castles, abandon buildings and ancient monuments. But it’s a technique that’s just at home with portraits and wildlife photography.
The majority of digital camera sensors include an infrared blocking filter for standard photography, and this needs to be removed in order to be able to take infrared pictures. Converting a camera to infrared like this means that you won’t be able to use it for regular full colour photography, so you’ll need to adapt a spare camera.
Not all of us happen to have an old digital SLR knocking around or the spare cash to convert it into an infrared camera. But there is an alternative: using an infrared filter. This screws onto the front of the lens and blocks all light bar infrared.
IR filters are very dark though, which means long exposure times – they’re useless for taking infrared photos of moving subjects.
You won’t be able to see anything through the viewfinder either, so it’s best to compose and manually focus before adding the filter. You’ll also need to spend a little time converting the image later.
If you don’t want to buy a filter, you can always learn how to add an infrared effect in Photoshop (Soon will be available). You can try this technique with any image, although if you take a photo with a fake infrared look in mind you’re more likely to end up with a successful result.

Monday, 6 April 2015

How to make a DIY macro lens?


Macro lenses are brilliant optics, but you don’t need to spend much for one if you’re just a casual macro photographer. In our latest DIY Photography Tricks post we show you how to make a DIY macro lens using a simple cardboard tube…
If macro photography is your passion, spending a few Thousand rupees on a decent macro lens is a must. Altertnatively, you could get an extension tube or a close-up filter to enlarge your subject. But what if you want to get really close to your subject without the expense, perhaps just to try macro out?
It’s surprisingly easy to convert a standard lens into a macro, using nothing more than a cardboard tube, an old camera body cap and some tape…

How to make a DIY macro lens

01 Make a camera fitting
Start with a way to attach the lens to the camera. Find an old body cap. Drill a few holes on the inside, then use a small saw or a file to create an aperture in the middle.

02 Find a tube
We need distance between the sensor and lens to extend the focal length. Find a cardboard tube with roughly the same diameter as the body cap.

03 Prepare the tube
Cut the tube to about 15cm: this will vary depending on your lens you use, but it’s a good starting length. To stop light from bouncing around, stick black paper inside.

04 Fit the lens
Use insulation tape to stick the body cap inside the tube. With the front of the lens facing the tube, tape it in place so the end that usually fits onto the camera is exposed.

05 Set the aperture
On the back of the lens is a lever that camera uses to set the aperture. Position it so that the aperture is fully open and fix it with tape.
06 Start shooting!
In your camera’s menu, activate the setting that enables the camera to shoot without a lens. Fix the camera on a tripod, set to Manual and take a few test shots.
Final tip
When you shoot, you’ll need to adjust the shutter speed to get the correct exposure. To focus, change the camera’s distance from the subject.

Source: DIY Photography