Showing posts with label Style. Show all posts

Tuesday, 14 April 2015

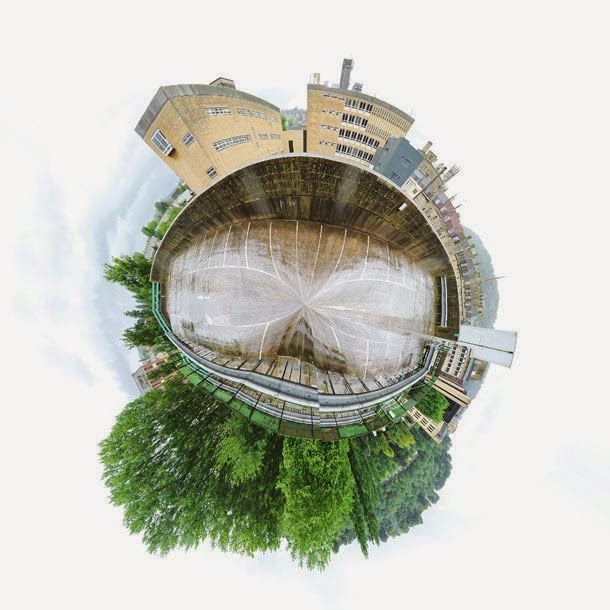
How to make a 360 degree polar panorama

360_degree_Panorama

Polar panoramas are fun takes on the traditional panoramic ‘strip’. The principle is the same – take a sequence of images that you then stitch together in software – it’s just that you create a circular ‘world’ image at the final stage of the process.
As with other types of panoramic photography, you need a methodical approach to taking the individual frames. Take test shots of the brightest and darkest parts of the scene and work out the base exposure from these results. Use manual mode to set the aperture and shutter speed, and set the white balance and focus manually too, as this will ensure consistency across the sequence of pictures.
Make sure the tripod and head are level and, when you move the camera, allow for approximately 1/3 overlap between each frame. Shooting enough frames to cover a 360 degree image will mean your final panorama ‘globe’ won’t look stretched or have an obvious join.
Use panorama software such as Photoshop’s Photomerge option to stitch and blend the frames together. The next stage involves flipping the panorama photo vertically and resizing it to create a square image. To do this, use Image > Image Size in Photoshop. Make sure the ‘Constrain aspect ratio’ link box is unchecked and then change the width and height to the same value.

The final step is to use Filter > Distort > Polar Coordinates, selecting Rectangular to Polar in the dialog box that appears.

Monday, 6 April 2015

How to make a DIY macro lens?


Macro lenses are brilliant optics, but you don’t need to spend much for one if you’re just a casual macro photographer. In our latest DIY Photography Tricks post we show you how to make a DIY macro lens using a simple cardboard tube…
If macro photography is your passion, spending a few Thousand rupees on a decent macro lens is a must. Altertnatively, you could get an extension tube or a close-up filter to enlarge your subject. But what if you want to get really close to your subject without the expense, perhaps just to try macro out?
It’s surprisingly easy to convert a standard lens into a macro, using nothing more than a cardboard tube, an old camera body cap and some tape…

How to make a DIY macro lens

01 Make a camera fitting
Start with a way to attach the lens to the camera. Find an old body cap. Drill a few holes on the inside, then use a small saw or a file to create an aperture in the middle.

02 Find a tube
We need distance between the sensor and lens to extend the focal length. Find a cardboard tube with roughly the same diameter as the body cap.

03 Prepare the tube
Cut the tube to about 15cm: this will vary depending on your lens you use, but it’s a good starting length. To stop light from bouncing around, stick black paper inside.

04 Fit the lens
Use insulation tape to stick the body cap inside the tube. With the front of the lens facing the tube, tape it in place so the end that usually fits onto the camera is exposed.

05 Set the aperture
On the back of the lens is a lever that camera uses to set the aperture. Position it so that the aperture is fully open and fix it with tape.
06 Start shooting!
In your camera’s menu, activate the setting that enables the camera to shoot without a lens. Fix the camera on a tripod, set to Manual and take a few test shots.
Final tip
When you shoot, you’ll need to adjust the shutter speed to get the correct exposure. To focus, change the camera’s distance from the subject.

Source: DIY Photography