Professional photographers use their cameras every day, so they get to know it really well and understand the best way to set it up and use it. In their latest guest blog post the photo management and Canon Project1709 experts at Photoventure spoke to pros in many different fields to find their six most useful tips for using your camera effectively.
 By default cameras are set to focus the lens and activate exposure metering when the shutter release button is half-pressed.
This works well in many situations, but if you’re waiting for a moving subject to come into the frame, or for the composition to improve, you have to keep your finger on the shutter release or the focus may change from what you see in the viewfinder when you press it home.
It’s also easy to press the shutter release too far in your enthusiasm and take a sequence of unwanted shots.
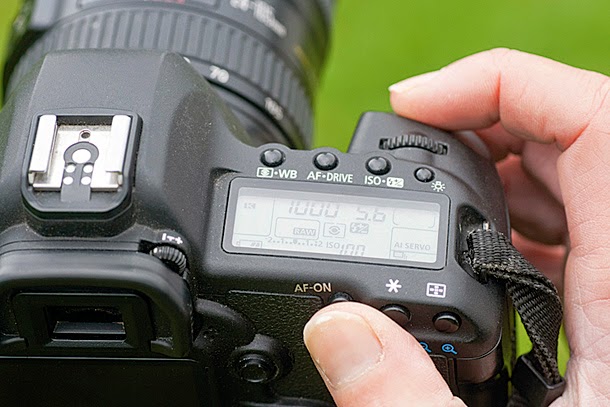
Consequently, many pros use a technique called ‘back-button focusing’, which uses a button on the back of the camera (often labelled AF-on) to control focusing.
Splitting the shutter release and focus control enables you to take a shot without refocusing the lens.
It’s especially useful when there’s a danger of another object coming between the camera and the subject because the lens won’t shift focus unless you press the AF-on button.
Your camera’s manual will explain exactly how to set-up your camera for back-button focusing, but the option you need is usually located in the Custom settings menu.
2. Advanced exposure modes

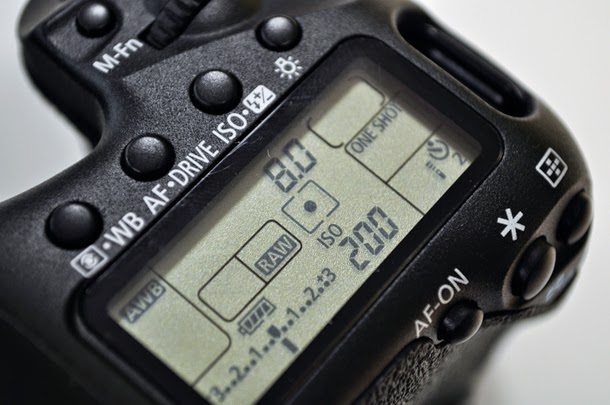
3. Spot metering
4. AE-Lock
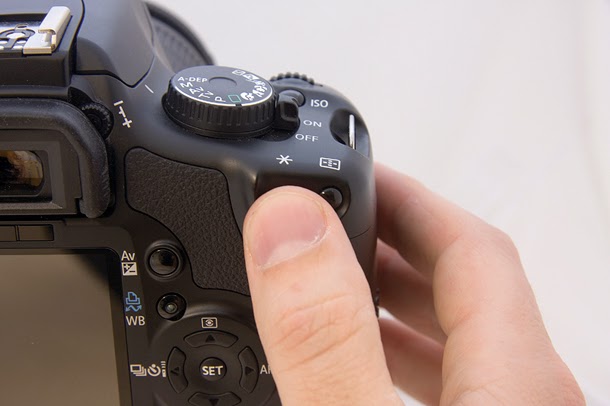 When shooting in aperture or shutter priority mode in tricky lighting conditions many pros use their camera’s auto-exposure lock (AE-Lock) in combination with spot metering because it locks the exposure settings to a particular value.
With a high contrast scene, for example, they might position the metering spot over a mid-tone area and press the AE-Lock button to set the exposure at the suggested value.
They then compose the image and take the shot safe in the knowledge that the exposure won’t change when the shutter release is pressed.
In some cases the AE-Lock remains active for just a few seconds, but it’s often possible to set it to operate until the button is pressed a second time.
The latter is especially useful if you have to wait for the composition to come good.
 Although pro-level cameras tend to have huge numbers of AF points, many professional sports photographers just stick to using the central points and then crop their images post-capture.
They do this for several reasons. Firstly, the central AF points are the most sensitive and accurate so they get the subject sharp quickly.
But also, it’s quicker to just use one AF point rather than constantly shifting the active AF point around the frame.
In addition, this is a more flexible approach that makes it less likely that they’ll miss an important part of the scene by composing too tightly.
1. Back-button focusing
This works well in many situations, but if you’re waiting for a moving subject to come into the frame, or for the composition to improve, you have to keep your finger on the shutter release or the focus may change from what you see in the viewfinder when you press it home.
It’s also easy to press the shutter release too far in your enthusiasm and take a sequence of unwanted shots.
Consequently, many pros use a technique called ‘back-button focusing’, which uses a button on the back of the camera (often labelled AF-on) to control focusing.
Splitting the shutter release and focus control enables you to take a shot without refocusing the lens.
It’s especially useful when there’s a danger of another object coming between the camera and the subject because the lens won’t shift focus unless you press the AF-on button.
Your camera’s manual will explain exactly how to set-up your camera for back-button focusing, but the option you need is usually located in the Custom settings menu.
2. Advanced exposure modes
In changing lighting conditions aperture and shutter priority offer a convenient way of ensuring that exposure is correct whilst still retaining control over the most important aspects of the image.
Shutter priority is a good choice when you’re shooting sport or action as it determines whether the subject will be rendered sharp or blurred.
When depth of field is more important, however, aperture priority is the logical choice as you set the aperture while the camera sets the shutter speed.
For the ultimate in control, manual exposure mode is the way to go.
This allows you to set both the aperture and shutter speed, giving you control over depth of field and sharpness/blur.
It’s especially useful in high contrast situations as you set the exposure for the subject (using information gathered from the spotmeter) and you can shoot knowing that it will be correct whatever’s going on in the background.
Music photographers rely on manual exposure mode because once the exposure is set for the subject when the stage lights are in the right position, they just have to wait for the composition and lighting to look right in the viewfinder and fire away.
3. Spot metering
Although the default evaluative or matrix metering systems of modern cameras generally work very well, many pros like to take control over exposure a little more and use spot metering to meter for very precise areas within the scene.
The advantage of this approach is that they can ensure that the main subject is correctly exposed whatever the lighting conditions.
They can also meter from a mid-tone area to get the maximum range of tones in a high-contrast situation.
Spot metering is especially useful if your subject is backlit as many multi-area metering systems would be tricked into underexposure by the light in the background.
4. AE-Lock
With a high contrast scene, for example, they might position the metering spot over a mid-tone area and press the AE-Lock button to set the exposure at the suggested value.
They then compose the image and take the shot safe in the knowledge that the exposure won’t change when the shutter release is pressed.
In some cases the AE-Lock remains active for just a few seconds, but it’s often possible to set it to operate until the button is pressed a second time.
The latter is especially useful if you have to wait for the composition to come good.
5. Shoot and crop
They do this for several reasons. Firstly, the central AF points are the most sensitive and accurate so they get the subject sharp quickly.
But also, it’s quicker to just use one AF point rather than constantly shifting the active AF point around the frame.
In addition, this is a more flexible approach that makes it less likely that they’ll miss an important part of the scene by composing too tightly.
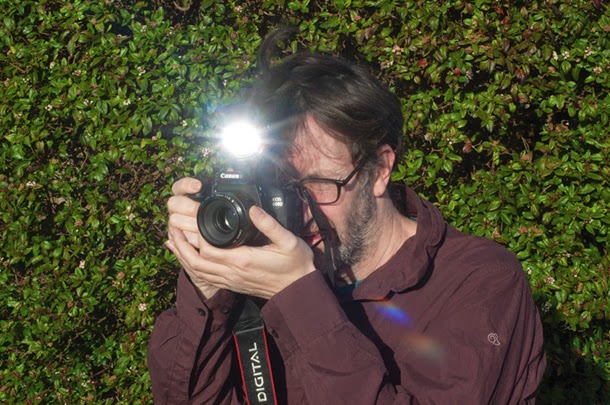
6. Fill-in flash
News, event and social photographers always use flash because it brings their subject to life, helps separate it from the background a little and gets rid of harsh shadows.
As most pro-level cameras don’t have a flash built-in this light comes from a flashgun, which has the added benefit of being a bit further away from the lens than a pop-up flash and this reduces the chance of red-eye.
In some cases they may have the flash on a bracket so it’s even further away from the lens than when it’s mounted on top of the camera.
Many pros also use a diffuser to soften the light and make it more flattering.
After all, it’s in the interests of a social photographer to make their subject look good.
No comments:
Post a Comment