Nothing can bring your landscape photography to life more than a sharp, stunning water reflection. In this tutorial we explain how to photograph a reflection and suggest several key techniques and tips for finding suitable subjects.
 Water in its many forms is an integral part of landscape photos. One element that never fails to catch the eye is reflections: there is something magical about a reflection, transforming an ordinary scene into something special.
A water reflection not only adds another layer of interest to the photograph but it also introduces an element of depth.
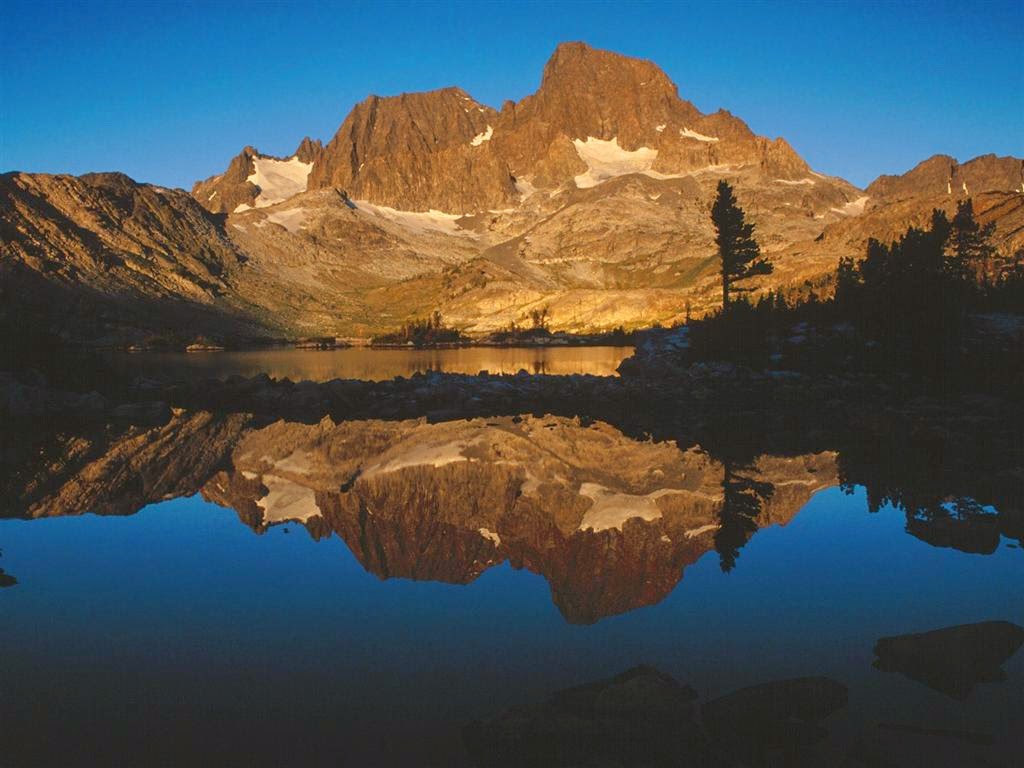
There are many forms of reflections and many different ways to photograph them. One of the classic examples is a landscape with its reflection mirrored in tranquil water. This kind of image relies on shooting in flat, calm conditions.
Early morning is usually best, but check out the weather forecast the evening before and choose a location where the water is sheltered. Smaller, shallower pools provide the best chance of ripple-free water. Remember that it’s possible to create effective water reflection shots with just a puddle!
Most subjects with a perfect reflection make great pictures. These might include colourful autumnal trees, mountains, buildings in either rural or urban settings, harbours and boats.
Shots taken in early morning light look fantastic when warm tones are reflected in the cooler colours of the shaded water. This differential lighting, where light is falling on the main subject but the water itself is in shadow, is very effective and often leads to dramatic images.
If you’re in a new location, use a compass or phone app to work out when the sun will come up, then place some calm water between you and the scene with the sun at your back.
Slightly rippled water can produce stunning results. Often the wind begins to pick up an hour or so after sunrise, creating small ripples across the surface. The distorted water reflection caused by the ripples adds a sense of intrigue to the picture and gives it more of an abstract feel.
This effect can be exaggerated by excluding the main subject from the picture and concentrating solely on the reflection. Lakeside trees work well with this treatment, and the effect is colourful during the autumn.
Water reflections don’t have to be of a grand landscape. For example, cutting out the sky from the picture can sometimes produce a much stronger image. Smaller aspects such as reeds and rocks also make good subjects when they are skilfully composed to include areas of colourful reflections in the water – from a blue sky or at sunrise or sunset.
This technique can work best when the foreground elements are in shadow. By then exposing for the brightest part of the water, the foreground is thrown into silhouette to create an image strong on shape and colour.
Shoot subjects plus their reflection or just the reflection – still water or ripples. If you add foreground interest such as rocks or a boat, there is no shortage of ideas to create pictures that pack a double punch. That’s something worth reflecting on…
Alternatively, stitch a series of frames together for a high-resolution panorama. Use a tripod and shoot successive frames with a 30% overlap.
Set the exposure in manual mode and focus manually for consistency. Use stitching software to form the composite panoramic.
A water reflection not only adds another layer of interest to the photograph but it also introduces an element of depth.
There are many forms of reflections and many different ways to photograph them. One of the classic examples is a landscape with its reflection mirrored in tranquil water. This kind of image relies on shooting in flat, calm conditions.
Early morning is usually best, but check out the weather forecast the evening before and choose a location where the water is sheltered. Smaller, shallower pools provide the best chance of ripple-free water. Remember that it’s possible to create effective water reflection shots with just a puddle!
Most subjects with a perfect reflection make great pictures. These might include colourful autumnal trees, mountains, buildings in either rural or urban settings, harbours and boats.
The best time to shoot a water reflection
Shots taken in early morning light look fantastic when warm tones are reflected in the cooler colours of the shaded water. This differential lighting, where light is falling on the main subject but the water itself is in shadow, is very effective and often leads to dramatic images.
If you’re in a new location, use a compass or phone app to work out when the sun will come up, then place some calm water between you and the scene with the sun at your back.
Slightly rippled water can produce stunning results. Often the wind begins to pick up an hour or so after sunrise, creating small ripples across the surface. The distorted water reflection caused by the ripples adds a sense of intrigue to the picture and gives it more of an abstract feel.
This effect can be exaggerated by excluding the main subject from the picture and concentrating solely on the reflection. Lakeside trees work well with this treatment, and the effect is colourful during the autumn.
Water reflections don’t have to be of a grand landscape. For example, cutting out the sky from the picture can sometimes produce a much stronger image. Smaller aspects such as reeds and rocks also make good subjects when they are skilfully composed to include areas of colourful reflections in the water – from a blue sky or at sunrise or sunset.
This technique can work best when the foreground elements are in shadow. By then exposing for the brightest part of the water, the foreground is thrown into silhouette to create an image strong on shape and colour.
Shoot subjects plus their reflection or just the reflection – still water or ripples. If you add foreground interest such as rocks or a boat, there is no shortage of ideas to create pictures that pack a double punch. That’s something worth reflecting on…
Three must-know techniques for shooting a water reflection
Find the best light
Use low-angled sun to capture warmly lit reflections in the cooler tones of shaded water. Avoid bright overhead sun. Use early morning mist to add interest. On overcast days, eliminate the sky and its reflection from the picture by framing tightly.Compose your shot
For a perfectly symmetrical reflection, break the rules and place the horizon bang in the middle of the frame. Alternatively, place the horizon on the upper or lower third to emphasise different parts of the picture. Focusing on a rippled reflection will create an abstract image.Set your exposure
Using spot metering mode, take an exposure reading from a middle-toned area of the reflection. Set this exposure in manual, or lock the exposure. Use an ND grad filter to balance the exposure. Set an aperture of f/11 or f/16 to maximize depth of field, then focus on the water.How to shoot a panoramic water reflection
When shooting landscape reflections, the image format ratio of 3:2 doesn’t always suit the subject. A panoramic format of around 3:1 can work much better. Simply crop your image in Photoshop.Alternatively, stitch a series of frames together for a high-resolution panorama. Use a tripod and shoot successive frames with a 30% overlap.
Set the exposure in manual mode and focus manually for consistency. Use stitching software to form the composite panoramic.
No comments:
Post a Comment