.jpg)
Your brain compensates automatically, so that you perceive colours as pretty consistent; and your camera’s Auto White Balance setting is designed to do the same.
However, it can get it wrong, overcompensating when you don’t want it to and coming up with unusual hues in mixed lighting.
You might be lucky: your camera’s Auto (or preset, for that matter) WB setting may have been spot-on, so your image appears perfectly neutral when you open it in Adobe Camera Raw with the default As Shot setting applied.
However, considering that Auto settings aren’t infallible and camera presets are generic, you’re likely to have to make some minor tweaks at the very least.
Go to the White Balance menu in the Basic tab, and try the Auto setting first; if that doesn’t do the trick, try the preset you think best represents the lighting conditions under which the shot was taken.
The presets (not available if the shot isn’t a raw file) correspond to settings found on most cameras, and have the same effect on the image as choosing that setting in-camera would have done.
Flicking between As Shot, Auto and the presets will give you a fair idea of what works, and you can fine-tune with the Temperature (blue/yellow) and Tint (green/magenta) sliders.
Alternatively, you can click on a suitable tone with the White Balance Tool.
White balance correction: how to fix a colour cast
Follow these simple steps using Adobe Camera Raw to get more accurate colour casts.
01 Auto white balance
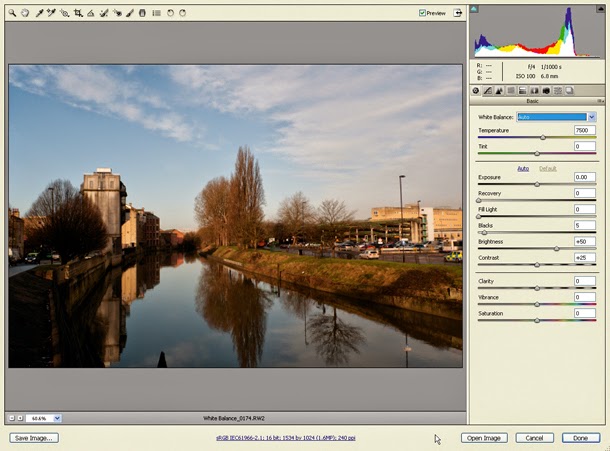
This shot was taken on a sunny mid-morning but with the white balance set to Shade, so the image has a slight warm cast – it’s more obvious once you’ve corrected it. First, we select Auto from the White Balance menu (the default is As Shot): in this case it warms the image further, which isn’t what we want.
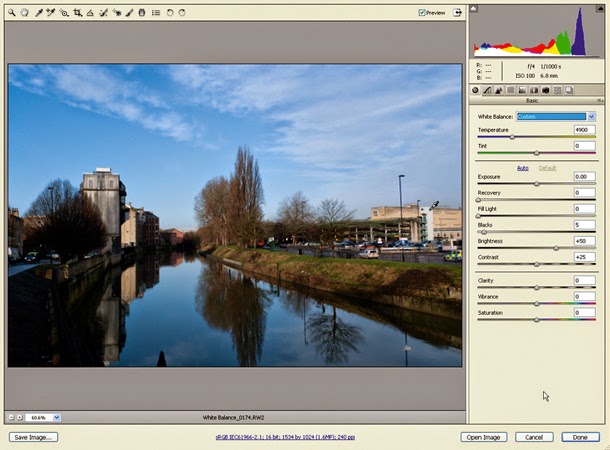
02 Presets

The Cloudy and Shade presets also warm the image, although the Shade preset produces an effect slightly different from the camera setting. The Tungsten preset – shown here – tints the image a deep blue, because ACR thinks it needs to cool down an image that was taken under very warm indoor lighting.
03 Daylight setting

04 White Balance Tool
Clicking with the White Balance Tool on the most prominent diffuse white area – the lift shaft to the right of the car park – cools the image and removes the magenta tint. Fine-tune by eye by moving the Temperature slider to the left to cool the shot or to the right to warm it – push it all the way to the right, for example, and it looks like a late afternoon in summer.
COMMON Q.
How do I adjust multiple images?
To apply a WB adjustment to multiple shots, open them in Filmstrip mode. In Elements, open one shot in the main window, click ‘Select All’ at the top of the Filmstrip then adjust the open image. All the changes you make will applied to all the other shots too.
Under Photoshop, adjust one shot as required, then click Select All’ >‘Synchronise. Select White Balance as the setting to apply to the others.
How do I get more accurate white balance settings?
Use a photographic grey card. One method is to take a shot with the card filling the frame, and use this to set a custom white balance in-camera; Adobe Camera Raw will then apply this as the default ‘As Shot’ setting.
Alternatively, just take a shot of the card in the course of the shoot (make sure it receives light from the same source as the subject you’re shooting).
Open this photo in Adobe Camera Raw, and click on its grey tone with the White Balance Tool. You can then apply this adjustment to the rest of the shoot.
Can white balance be used creatively?
Colour casts can of course be used to evoke an atmosphere. A subtle warm glow can liven up pale skin or create a summertime feel in a landscape.
Cool blue casts can produce a more moody atmosphere and are great for urban landscapes, or for creating a character portrait with a brooding, detached feel. There’s no fast or easier way than Adobe Camera Raw to add such creative tints!
It was really great blog provide helpful information !
ReplyDeleteHow to Edit RAW Images As a Beginner & Why You Need Them