Photography for beginners: 01 You know what you’re shooting
Many modern cameras have some form of scene recognition system that uses information about the brightness distribution and colour of the scene along with data from the AF system about the proximity of the subject.
Once a camera has detected what the subject is it will select settings that should deliver an image that’s ‘typical’ for that type of scene.
If a landscape is detected for example, the camera will select a small aperture to capture plenty of depth of field and enhance greens and blues to produce a punchy shot.
Manually selecting the Landscape scene mode does a similar thing, but saves the camera from having to work-out what the subject is.

There are times, however, when you may want to shoot a landscape in a non-typical way. You might want to restrict depth of field, for example, to emphasis one element of the scene, or perhaps have muted colours.
On these occasions you need to take control over the exposure and consider which is the best Picture Style or Picture Control mode to use.
As usual the best results will be produced by shooting raw files because they give you maximum control over colour and contrast post-capture.
Photography for beginners: 02 The subject isn’t the closest object

However, this is often not the case. Imagine, for example, that you’re shooting a portrait in a garden with lots of flowers in the foreground and an off-centre subject, the camera may try to focus on one of the larger blooms rather than your subject.
The solution is simple, you need to take control over AF point selection yourself so that you can position it over the correct subject.
Alternatively, if there’s not an AF point exactly where you need one, move the camera so that the active point is over your subject, press the shutter release halfway to focus the lens and then, while keeping your finger on the shutter release, recompose the picture before pressing the shutter button fully home.
Photography for beginners: 03 The scene is very bright or very dark
In many cases it will deliver excellent result, however problems can arise if a scene is predominantly dark or bright.
The camera will suggest exposure settings that make large parts of the image a midtone, so if the scene is very dark it will suggest an exposure that will brighten it, making it overexposed.
Conversely, if the subject is very bright, the camera will suggest settings that underexpose it so it looks like a midtone and is darker than it should be.
In these situations you need to keep an eye on the histogram view and take control over the exposure either by using the exposure compensation facility or switching to manual exposure mode.
Photography for beginners: 04 The subject is backlit
This problem is similar to having a predominantly bright scene as the metering maybe fooled by the bright areas around the main subject so that the important part of the image is dark.Exposure compensation and manual control can come to the rescue, but you need to assess the exposure that’s required for the subject and the best way to do this is to switch from the Matrix or Evaluative metering to Spot or Centeweighted metering.
Photography for beginners: 05 You’re shooting a macro subject

The first step is to set the AF point carefully so that it’s directly over the subject. If this solves the problem, then great, but in many macro situations it’s better to focus manually.
If possible activate the camera’s live view and compose the image on the main screen.
Then use the magnify control to zoom right into the most important part of the subject and adjust the focus until it’s sharp.
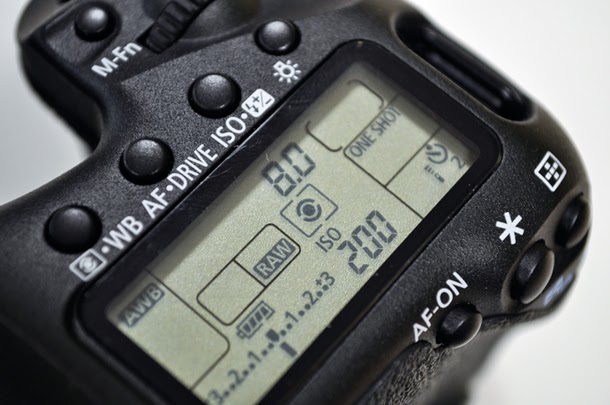
Photography for beginners: 06 Shooting in warm/cold light
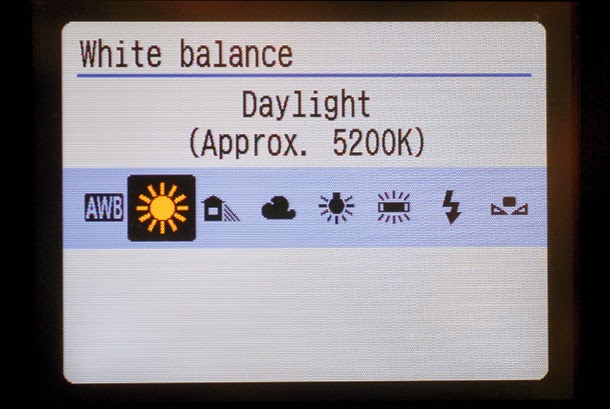
In many cases the problem can be resolved by switching to the Daylight white balance setting, or tuning the white balance to make the image slightly cooler or warmer as required.
Conversely, some systems also cannot cope with artificial light and the images have a strong colourcast.
This may be corrected by switching to the white balance setting that specifically designed for those lighting conditions.
Alternatively, you can set the white balance manually. With most cameras this is just a question of finding and activating the custom white balance calibration mode (it’s called Preset Manual on Nikon cameras) and photographing a neutral white or grey card in the same light as your subject.
With Canon DSLRs, take the photo of the white target first with AWB set, then navigate to Custom White Balance in the menu and, when prompted, select the image. The last step is to set the white balance to the custom setting.
You could also use the Kelvin setting to adjust the white balance until you get a result that you are happy with.
No comments:
Post a Comment