Tuesday, 14 April 2015

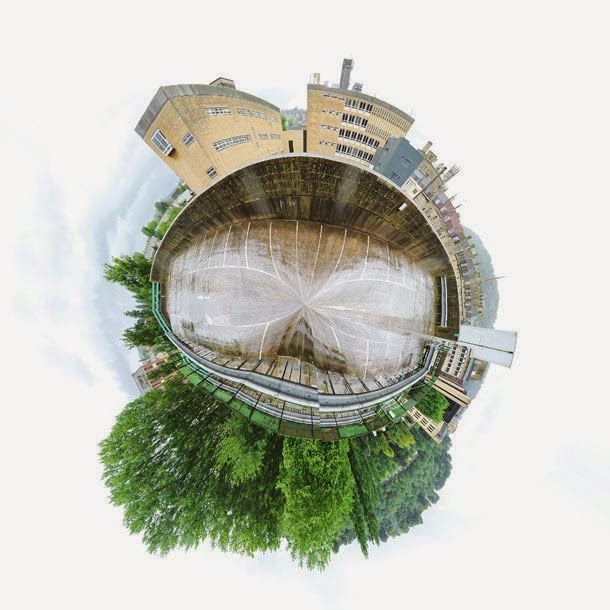
How to make a 360 degree polar panorama

360_degree_Panorama

Polar panoramas are fun takes on the traditional panoramic ‘strip’. The principle is the same – take a sequence of images that you then stitch together in software – it’s just that you create a circular ‘world’ image at the final stage of the process.
As with other types of panoramic photography, you need a methodical approach to taking the individual frames. Take test shots of the brightest and darkest parts of the scene and work out the base exposure from these results. Use manual mode to set the aperture and shutter speed, and set the white balance and focus manually too, as this will ensure consistency across the sequence of pictures.
Make sure the tripod and head are level and, when you move the camera, allow for approximately 1/3 overlap between each frame. Shooting enough frames to cover a 360 degree image will mean your final panorama ‘globe’ won’t look stretched or have an obvious join.
Use panorama software such as Photoshop’s Photomerge option to stitch and blend the frames together. The next stage involves flipping the panorama photo vertically and resizing it to create a square image. To do this, use Image > Image Size in Photoshop. Make sure the ‘Constrain aspect ratio’ link box is unchecked and then change the width and height to the same value.

The final step is to use Filter > Distort > Polar Coordinates, selecting Rectangular to Polar in the dialog box that appears.

Sunday, 12 April 2015

How to make a Double Exposure Portrait Photo

Dual Exposure

Combining one photo with another isn’t a new technique: it’s been around since the late 19th century.
One of the most popular forms of double exposure photography is the combination of a portrait with a natural pattern. A strong texture tends to work best, whether it’s foliage, tree branches shot against a white sky or cracked earth.
Some DSLRs have a multiple exposure mode that enables you combine images in-camera. You can produce some quite striking images without resorting to Photoshop manipulation. Don’t believe us?

For a clean silhouette, you’ll need a white backdrop – getting low and photographing your portrait-sitter against a bright, cloudy sky is ideal. Do the same with the image you’ll be combining it with. Working in Live View mode is best, as you will be able to display the first image on the rear screen while you align the second. The two frames will then be automatically merged, with the texture being visible in the darker areas of the first image.

Not all cameras can take multiple exposures, in which case you’ll need to combine the photos in image editing software. Making a double exposure portrait in Photoshop (Lets see in another tutorials) is a simple process and one which provides an endless opportunity to fine-tune the blend between the portrait image and the texture.