Tuesday, 29 April 2014

Best lens for portraits: 5 sensibly priced options tested and rated

Portrait lenses on test


Canon EF 85mm f/1.8 USM
Price: $369/£299

Nikon AF-S 85mm f/1.8G
Price: $497/£379

Olympus M.Zuiko 45mm f/1.8
Price: $399/£279

Sigma 50mm f/1.4 EX DG HSM
Price: $499/£349

Sony 85mm f/2.8 SAM
Price: $298/£179

Professional portrait photographers tend to favour top-money portrait lenses like the Canon EF 85mm f/1.2 or Nikon 85mm f/1.4G.

But for those of us who don’t want to use this type of lens on a daily, money- earning basis, the respective prices of $2,000/£1,700 and $1,629/£1,200 put them beyond sensible reach.

At the other end of the scale, lenses like the Canon EF 50mm f/1.8 cost a mere $110/£80, but come up short in terms of features, performance and build quality.

Thankfully, there’s plenty of choice to be had in the middle ground, with a range of prime (fixed length) lenses costing between $300/£200 and $500/£400. Let’s see how five of these portrait lenses measure-up.

Wednesday, 23 April 2014

Raw Editing: what you need to know about white balance correction

White balance settings are necessary because ‘white’ light isn’t plain white at all. Different light sources and lighting conditions have different colour temperatures: indoor lighting is warmer (more orange) than daylight, though daylight itself is warmer at dawn, turns cooler (more blue) in the course of the day, and becomes warmer again towards sunset.

Your brain compensates automatically, so that you perceive colours as pretty consistent; and your camera’s Auto White Balance setting is designed to do the same.

However, it can get it wrong, overcompensating when you don’t want it to and coming up with unusual hues in mixed lighting.

You might be lucky: your camera’s Auto (or preset, for that matter) WB setting may have been spot-on, so your image appears perfectly neutral when you open it in Adobe Camera Raw with the default As Shot setting applied.

However, considering that Auto settings aren’t infallible and camera presets are generic, you’re likely to have to make some minor tweaks at the very least.

Go to the White Balance menu in the Basic tab, and try the Auto setting first; if that doesn’t do the trick, try the preset you think best represents the lighting conditions under which the shot was taken.

The presets (not available if the shot isn’t a raw file) correspond to settings found on most cameras, and have the same effect on the image as choosing that setting in-camera would have done.

Flicking between As Shot, Auto and the presets will give you a fair idea of what works, and you can fine-tune with the Temperature (blue/yellow) and Tint (green/magenta) sliders.

Alternatively, you can click on a suitable tone with the White Balance Tool.

White balance correction: how to fix a colour cast


Follow these simple steps using Adobe Camera Raw to get more accurate colour casts.

  01 Auto white balance

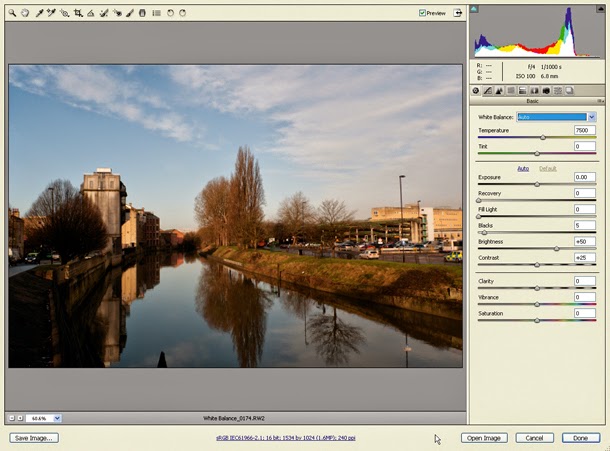
 This shot was taken on a sunny mid-morning but with the white balance set to Shade, so the image has a slight warm cast – it’s more obvious once you’ve corrected it. First, we select Auto from the White Balance menu (the default is As Shot): in this case it warms the image further, which isn’t what we want.

02 Presets


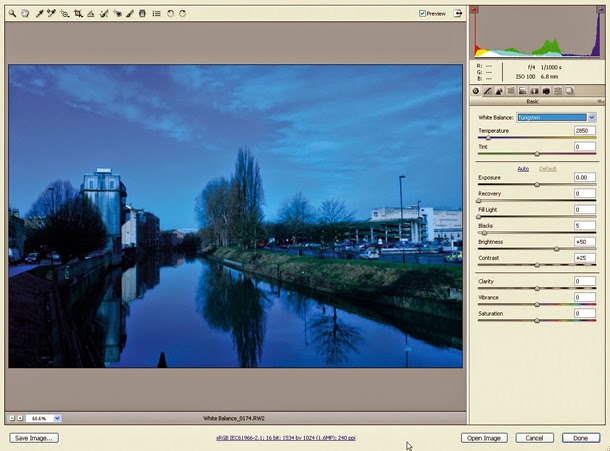
The Cloudy and Shade presets also warm the image, although the Shade preset produces an effect slightly different from the camera setting. The Tungsten preset – shown here – tints the image a deep blue, because ACR thinks it needs to cool down an image that was taken under very warm indoor lighting.

03 Daylight setting

You’d expect the Daylight setting to get you close, and it does. However, the colour temperature of daylight varies considerably with the time of day. The Daylight preset is designed to warm up images taken under midday lighting, so it leaves our mid-morning image still looking a little too warm, with the hint of a magenta cast.

04 White Balance Tool

 Clicking with the White Balance Tool on the most prominent diffuse white area – the lift shaft to the right of the car park – cools the image and removes the magenta tint. Fine-tune by eye by moving the Temperature slider to the left to cool the shot or to the right to warm it – push it all the way to the right, for example, and it looks like a late afternoon in summer.


COMMON Q.

How do I adjust multiple images?


To apply a WB adjustment to multiple shots, open them in Filmstrip mode. In Elements, open one shot in the main window, click ‘Select All’ at the top of the Filmstrip then adjust the open image. All the changes you make will applied to all the other shots too.

Under Photoshop, adjust one shot as required, then click Select All’ >‘Synchronise. Select White Balance as the setting to apply to the others.

How do I get more accurate white balance settings?


Use a photographic grey card. One method is to take a shot with the card filling the frame, and use this to set a custom white balance in-camera; Adobe Camera Raw will then apply this as the default ‘As Shot’ setting.

Alternatively, just take a shot of the card in the course of the shoot (make sure it receives light from the same source as the subject you’re shooting).

Open this photo in Adobe Camera Raw, and click on its grey tone with the White Balance Tool. You can then apply this adjustment to the rest of the shoot.

Can white balance be used creatively?


Colour casts can of course be used to evoke an atmosphere. A subtle warm glow can liven up pale skin or create a summertime feel in a landscape.

Cool blue casts can produce a more moody atmosphere and are great for urban landscapes, or for creating a character portrait with a brooding, detached feel. There’s no fast or easier way than Adobe Camera Raw to add such creative tints!

10 quick black and white photography tips


Lets See What Are They
Learn to see the world in shades of grey and discover the art of black and white photography. Here are 10 excellent black and white photography tips to get you started…

Without the extra dimension (or confusion!) of colour, you can more easily explore the shapes, lighting and textures of an image in a new way. These quick photography tips show you how.

1 Think in mono


It’s all very well using Photoshop to do a mono conversion of a colour shot and hoping that it looks good, but the greatest black-and-white images by all the best photographers have been pre-visualised that way. Even if you’re capturing your original images in colour, try to think of and look for subjects with mono shots in mind and you’ll start producing better results.

2 Filter effects


Traditional film photographers used coloured filters to control the type of mono images they produced – a red filter would generally increase the contrast, for example. You can put a filter on your digital camera and achieve similar results, although your original file will be tinted with the colour before you convert to black and white. If you’d like the best of both worlds, shoot without a filter but replicate the effect in post-processing. Most image-editing packages offer a menu of filter presets.
@ Duotone

3 Duotone


A duotone effect can be used to enhance your mono images. The effect can be replicated using software such as Photoshop CS or Photoshop Elements in a number of ways, and it’s a relatively easy technique to learn. But it’s important to think about how a coloured tint will affect the overall mood of your picture. A blue tint evokes a sense of coolness that might not be appropriate for some subjects but perfect for others. A yellow or brownish tint, such as sepia, might allude to something old and historical.

4 Split-toning


This wonderful technique was popular with traditional black-and-white photographers who, using a concoction of chemicals, would literally split the tones in their prints. The end result would show a subtle shift to one tint in the highlights and lighter tones while another tint would colour the dark tones. The results could be spectacular. Like many old darkroom techniques you can easily recreate a split-tone effect in Photoshop and other software, and it’s a lot less messy.

5 Texture, form & shape


Without colour a black-and-white image is reliant on texture, form and shape. As you go about your photographic business, train your brain and eye to disregard the colour information and instead concentrate on the shapes and light within the frame.

6 Shoot RAW


Shoot in RAW and use the power of processing software such as Adobe Camera Raw to convert your images non-destructively to black and white. You can also change the tones and contrast and even add a coloured tint. It’s also possible to replicate the effect of a split-tone image and add a vignette effect for an extra creative touch.

7 Black & white portraits


Portraiture can be greatly enhanced with a competent mono conversion. Where clothing and hair colours can clash and distract from your subject’s face, a black and white conversion can draw the eyes to their facial features instead. It’s also a good way to smooth out facial skin tones. Just don’t expect to get a great image if you simply desaturate the picture. You’ll end up with a flat grey photo. Instead, follow this guide to quality black and white conversion and use dodge and burn techniques to boost contrast in specific areas.

8 High key/low key


Through a combination of lighting and digital darkroom techniques you can create mono images that are either very light or dark in their tonal quality. Images produced in this way can be beautiful and emotive, but it’s not simply a case of over- or under-exposing your shots or pushing Photoshop’s Levels sliders to the extremes. Use lighting and exposure to create images that still have detail in the highlights or shadows. Your camera’s histogram and highlight clipping alerts will come in very handy for this technique.

9 Mono HDR


Ansel Adams (1902-1984) was a master mono photographer who developed the zone system so that he could get details in both the highlight and shadows of his splendid scenes. Today you can cheat a little. By taking several images of a scene at different exposures you can combine them using HDR (High Dynamic Range) software, such as Photomatix. This is a great way to get an image with a full tonal range, but don’t go over the top!

10 Practice!


The more you train your eye to see in black and white the better your images will be. There’s no substitute for hard graft and, as with most crafts, practice makes perfect. So get out there, keep your mono eyes open and shoot like crazy!

Lets Move On To>>>>> B&W


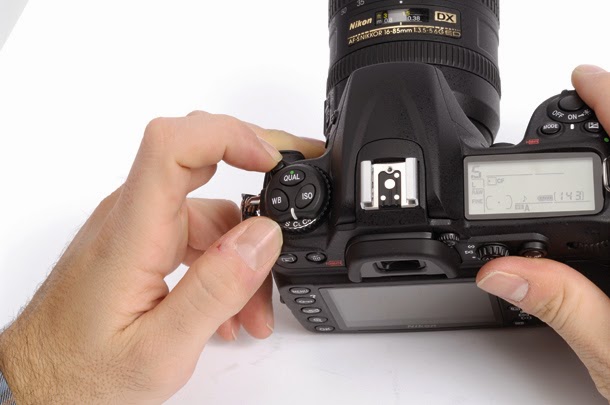
New Camera Setteings: 12 key camera settings to get you started right

Though it may seem daunting setting up a new camera, it only takes a few moments. Our Head of Testing, Angela Nicholson, shares her best camera tips and explains which camera settings to use so you can start taking great photos.

1. Format the card

When you insert a memory card into your new camera it’s a good idea to format it as this prepares it for use and deletes any existing data on it to maximise space.

We repeat – this deletes any existing data, so if you have any images on the card that you want to keep, download them to your computer before formatting the card.

It’s a simple process to format a card in-camera, just press the menu button and locate the format option – it’s often in the set-up or playback area, but it varies from brand to brand. Once you’ve found it, select it and hit OK then follow any on-screen instructions.

2. Image Quality: Extra Fine or Highest Quality JPEG

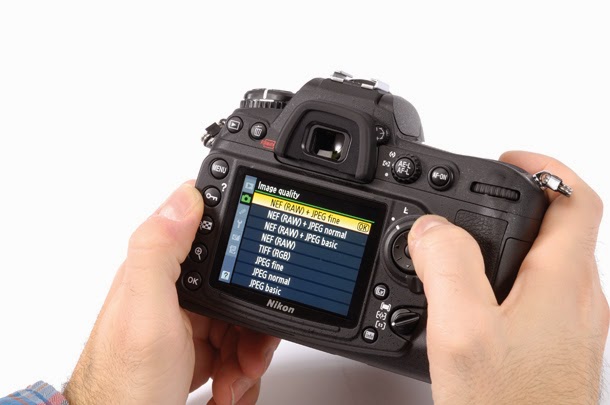
All digital cameras allow you to save images as JPEG files, but some also allow you to save them as raw files and raw and JPEG files at the same time.

Raw format files capture the maximum amount of data and they are the best option to use if you want to do lots of editing of images on the computer, but they require specialist software to process them because they are not a universally recognised format.

Fortunately, raw file conversion software, which allows some editing of raw files and their conversion to more widely recognised TIFF and JPEG files is usually provided with your camera.

Don’t forget, if you email a friend a raw image they are unlikely to be able to open it. They should be able to see JPEG files, however.

The JPEG format is also required if you want to upload images to social media sites like Facebook and Twitter, or to online labs to make prints.

If you want the best of both worlds, set your camera to record raw and JPEG files, but bear in mind that the memory card will fill up much more quickly.


 3. Image Size: Large

Most camera menus provide the option to shoot images at a range of sizes, or pixel counts. Smaller images take up less space on your memory card and are quicker to upload to Facebook etc, but to get the maximum benefit from your camera’s sensor you should select to shoot the largest images possible.

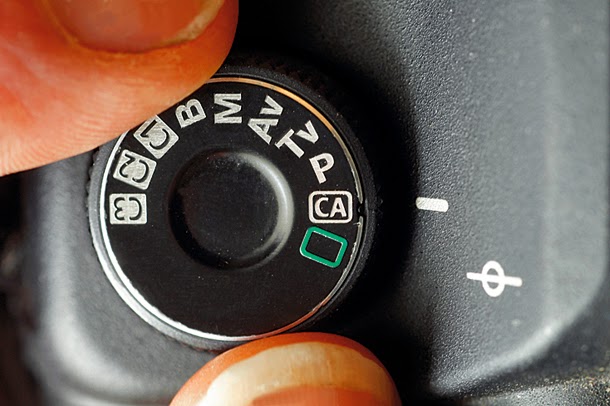
4. Exposure mode: Auto

Compact system cameras, DSLRs and high-end compacts offer a range of exposure modes – the method by which the correct exposure is set.

If you choose the Automatic option your camera will make the decisions for you so you can get shooting. If you would like to take a bit more control, however, try using one of the Scene mode options (Portrait, Landscape etc) that tailors the camera’s exposure and colour settings to suit the subject.

When you gain a bit more experience and confidence you may like to try using more advanced options like aperture priority and shutter priority.

In aperture priority mode you set the size of the aperture depending upon how big you want the area of the image that is in focus to be and the camera sets the shutter speed.

In shutter priority mode you set the shutter speed to freeze or blur, movement and the camera sets the aperture.

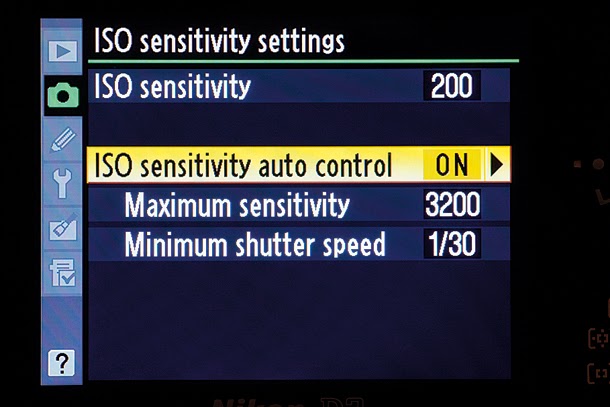
5. Sensitivity: Auto

The sensitivity or ISO setting determines how much light the camera needs to capture an image. At high ISO settings like ISO 6400 the camera only needs a small amount of light, but the image may be noisy and have some speckling visible.

Using a low sensitivity setting ensures high image quality, but it may require a slow shutter speed or large aperture setting. To save having to worry about this in the early days, set the camera to its automatic ISO setting.

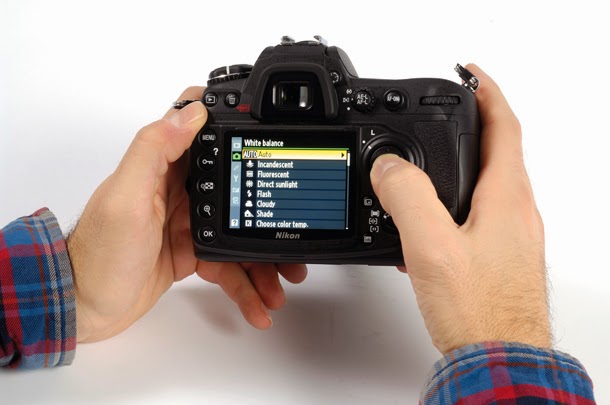
6. White balance: Auto

Different light sources produce light of slightly different colours but our brains do a great job of correcting the colour shift. The camera’s automatic white balance setting attempts to do the same thing.

It may not always get it right, and it may sometimes over-correct, but it’s a great starting point.

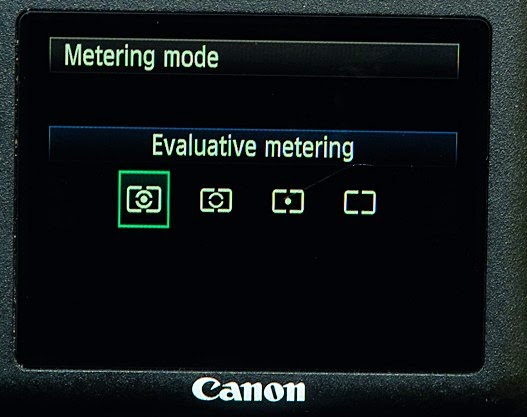
7. Metering: Evaluative, Matrix or Multi-segment

Your camera’s light metering system measures the amount of light available and suggests (or sets) appropriate exposure settings.

The name of the multi-purpose setting varies depending upon the brand of camera, but it’s often called Evaluative, Matrix, Multi-area or Multi-segment metering and it is the best option to use when you are starting out in photography.

This setting tells the camera to look at several areas across the whole frame and suggest/set aperture and shutter speed settings that give a balanced exposure.

8. Focus: Auto

There are two main focusing options, automatic and manual. In manual mode you have to rotate the lens’ focusing ring to get the subject sharp.

In automatic focusing mode the camera will do the work for you. It will focus on the point under the selected autofocus (AF) point.

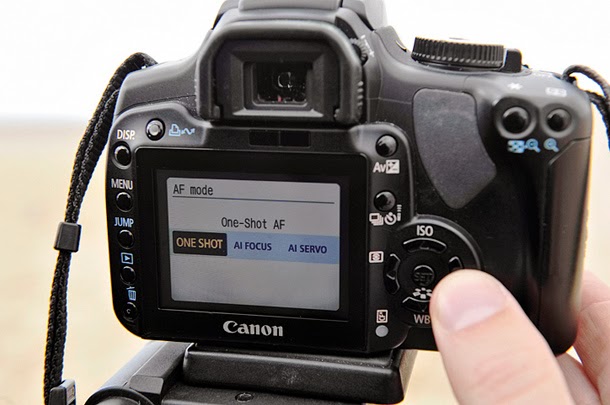
You may notice that there are usually two or three autofocus options options Single AF, continuous AF and Automatic AF mode. When Continuous AF mode is selected the camera will drive the lens focus mechanism as long as you hold the shutter release button down.

Many cameras also have an Auto AF mode in which it uses Single AF until it detects that the subject is moving and then switches to continuous AF mode.

In most situations you want to use Single AF mode so the lens focuses at one point and doesn’t change if you move the camera to recompose the image.

By default most cameras automatically set the AF point (where it’s going to focus) for you. It’s a useful option, but the camera often assumes the nearest object is your main subject.

In many cases its best to select a single focusing point that can be placed over the subject and used for more precise control. Look for a single point AF mode.

9. Drive Mode: Single


When your camera’s drive mode is set to Single or Single Frame it will only take one shot when you press the shutter release down. To take a second shot you have to lift your finger off the shutter button and then press again.

This is ideal for most shooting situations. The alternative is Continuous Shooting and in this mode the camera continues to take photographs for as long as you have your finger on the remote release button.

It is often used in conjunction with continuous AF mode to photograph moving subjects.

10. Image stabilisation: On

If your camera or lens has a stabilisation feature you should turn it on because it will help you to get sharper shots by compensating for the slight shaking that occurs when you hold it to take a shot.

It should be turned off if you put the camera on a tripod to hold it rock-steady.

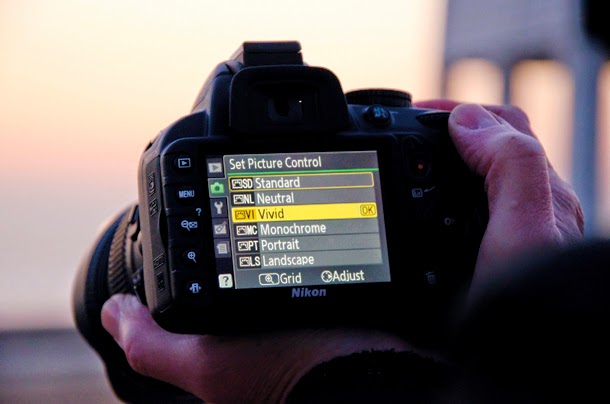
11. Picture Style or Picture Control: Standard


Many DSLRs and CSCs offer a collection of settings called Picture Styles, Picture Controls or Photo Styles. These are designed to tailor image colour, contrast and sharpness to suit a particular scene.

In Landscape Picture Style, four example, the camera usually enhances green and blue while boosting the sharpness and contrast a little.

These settings do not control exposure and should not be confused with Scene modes that set appropriate shutter speed and aperture settings for you – as well the Picture Style.

12. Colourspace: Adobe RGB

A colourspace basically defines the range of colours that a camera can capture. Most DSLRs and CSCs offer two options, Adobe RGB and sRGB. Adobe RGB has a wider gamut which means the camera will capture more colours when this mode is selected.

Most monitors can only display the smaller sRGB colourspace and online labs tend to use it, so if you plan to have lots of prints made by a lab it may be worth switching your camera to sRGB so you capture images within the range that the lab can reproduce.

You can however, convert images to sRGB using photo editing software.

Friday, 18 April 2014

Photography for beginners: 6 reasons you’re smarter than your camera

Photography for beginners: 01 You know what you’re shooting


Many modern cameras have some form of scene recognition system that uses information about the brightness distribution and colour of the scene along with data from the AF system about the proximity of the subject.

Once a camera has detected what the subject is it will select settings that should deliver an image that’s ‘typical’ for that type of scene.

If a landscape is detected for example, the camera will select a small aperture to capture plenty of depth of field and enhance greens and blues to produce a punchy shot.

Manually selecting the Landscape scene mode does a similar thing, but saves the camera from having to work-out what the subject is.
Similarly, using the Landscape Picture Style or Picture Control Mode tailors the contrast and colour of the image to suit the average landscape, while you take control over the exposure in your preferred advanced shooting mode.

There are times, however, when you may want to shoot a landscape in a non-typical way. You might want to restrict depth of field, for example, to emphasis one element of the scene, or perhaps have muted colours.

On these occasions you need to take control over the exposure and consider which is the best Picture Style or Picture Control mode to use.

As usual the best results will be produced by shooting raw files because they give you maximum control over colour and contrast post-capture.

Photography for beginners: 02 The subject isn’t the closest object

When they’re set to select the AF point many cameras assume that the subject is the nearest object and that it’s close to the centre of the frame.

However, this is often not the case. Imagine, for example, that you’re shooting a portrait in a garden with lots of flowers in the foreground and an off-centre subject, the camera may try to focus on one of the larger blooms rather than your subject.

The solution is simple, you need to take control over AF point selection yourself so that you can position it over the correct subject.

Alternatively, if there’s not an AF point exactly where you need one, move the camera so that the active point is over your subject, press the shutter release halfway to focus the lens and then, while keeping your finger on the shutter release, recompose the picture before pressing the shutter button fully home.

Photography for beginners: 03 The scene is very bright or very dark

A camera’s general-purpose metering system, often called Evaluative, Matrix or Multi-zone metering, expects to see a scene of ‘average’ brightness.

In many cases it will deliver excellent result, however problems can arise if a scene is predominantly dark or bright.

The camera will suggest exposure settings that make large parts of the image a midtone, so if the scene is very dark it will suggest an exposure that will brighten it, making it overexposed.

Conversely, if the subject is very bright, the camera will suggest settings that underexpose it so it looks like a midtone and is darker than it should be.

In these situations you need to keep an eye on the histogram view and take control over the exposure either by using the exposure compensation facility or switching to manual exposure mode.

Photography for beginners: 04 The subject is backlit

This problem is similar to having a predominantly bright scene as the metering maybe fooled by the bright areas around the main subject so that the important part of the image is dark.

Exposure compensation and manual control can come to the rescue, but you need to assess the exposure that’s required for the subject and the best way to do this is to switch from the Matrix or Evaluative metering to Spot or Centeweighted metering.

Photography for beginners: 05 You’re shooting a macro subject

Very close subjects tend to give AF systems problems because they expect the main subject to be a little further away and they often make the lens hunt around. In some cases it may miss the target altogether.

The first step is to set the AF point carefully so that it’s directly over the subject. If this solves the problem, then great, but in many macro situations it’s better to focus manually.

If possible activate the camera’s live view and compose the image on the main screen.

Then use the magnify control to zoom right into the most important part of the subject and adjust the focus until it’s sharp.

Photography for beginners: 06 Shooting in warm/cold light

Most automatic white balance systems to a fabulous job of producing natural-looking images, but they have a habit of over-correcting in warm or cool light so that the image looks more neutral than the scene appears to our eyes.

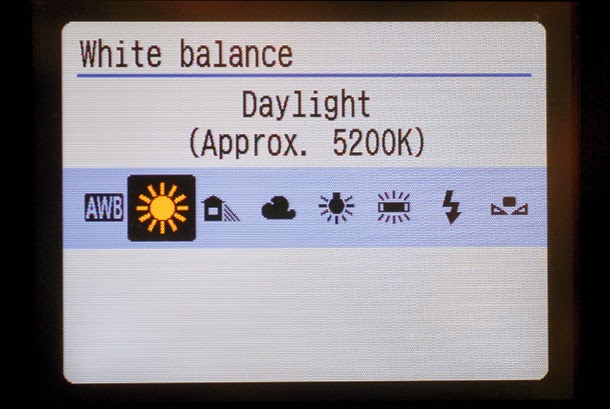
In many cases the problem can be resolved by switching to the Daylight white balance setting, or tuning the white balance to make the image slightly cooler or warmer as required.

Conversely, some systems also cannot cope with artificial light and the images have a strong colourcast.

This may be corrected by switching to the white balance setting that specifically designed for those lighting conditions.

Alternatively, you can set the white balance manually. With most cameras this is just a question of finding and activating the custom white balance calibration mode (it’s called Preset Manual on Nikon cameras) and photographing a neutral white or grey card in the same light as your subject.

With Canon DSLRs, take the photo of the white target first with AWB set, then navigate to Custom White Balance in the menu and, when prompted, select the image. The last step is to set the white balance to the custom setting.

You could also use the Kelvin setting to adjust the white balance until you get a result that you are happy with.

Canon EOS 1200D Review

Canon EOS 1200D review: Canon has upgraded its entry-level DSLR.

Canon EOS 1200D Review: Features


The new Canon EOS 1200D is the successor to the EOS 1100D and situs just below the 100D as the first camera in the line-up.

The Canon EOS 1200D isn’t a huge upgrade over its predecessor, the 1100D. One of its key selling points is a new app for iOS and Android, which is aimed at beginner photographers.

The Canon EOS 1200D app walks photographers through the camera’s key functions, providing tips and short tutorials that explain how to use them. The app also incorporates tutorials aimed at inspiring photographers to try different types of pictures.


In terms of specifications, it seems like Canon has played it relatively safe with the EOS 1200D.

The camera features an 18-megapixel sensor and a Digic 4 image processor, which although it is not Canon’s most recent imaging engine, it has proven to be a decent performer in previous Canon cameras we have tested.

The Canon EOS 1200D is aimed at beginner photographers I the entry-level market, and as such the camera offers several automatic modes, including Scene Recognition Auto and some Creative modes to give images a different look.

Canon has offered this before with the EOS 100D, but the difference here is that on the EOS 1200D these creative filters can only be added after you’ve taken a picture.

The Canon EOS 1200D also features a 3in, 460k-dot LCD screen on the back, which unfortunately isn’t neither touch-sensitive. Nor does it tilt or articulate. This is joined by an optical viewfinder offering a 95% field of view.
Other features include full HD video recording, with the added bonus of having full manual control during the recording – something rare for an entry-level DSLR.

The camera’s native sensitivity range runs from ISO 100 to 6400, which is expandable up to ISO 12800.

Like the EOS 1100D, the Canon 1200D offers 9 AF points, with just the central point being cross-type for extra sensitivity.

What’s more, the camera can shoot at up to 3fps, which doesn’t compare particularly well with the Nikon D3300, which can capture 5fps.
One feature we would have liked to see on the Canon 1200D is built-in Wi-Fi or NFC connectivity, but the camera is compatible with Eye-Fi cards.

The EOS 1200D uses Canon’s EF/EF-S lens mount, which is compatible with hundreds of different lenses. The size of the sensor (APS-C), makes for a 1.6x crop factor. What’s more, the Canon 1200D comes with an 18-55mm f/3.5-5.6 IS kit lens, offering an equivalent 28.8 – 88mm.

Canon claims the 1200D’s battery lasts up to 500 shots, which falls a little short of the Nikon D3300′s 700 shots per charge.

That said, the Canon 1200D has one important advantage over the Nikon D3300: it is much cheaper.

DSLR vs CSC: which one is best for you?

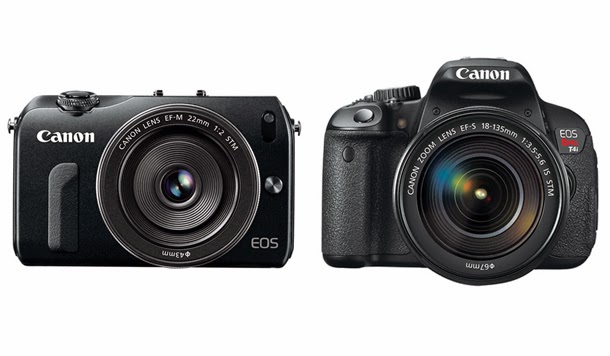
Digital technology has resulted in the development of a new type of camera, the compact system camera (CSC), also known as the mirrorless interchangeable lens camera.


CSCs are becoming increasingly popular and there are models available to suit every level of photographer from the novice to the professional. They are putting up some fierce competition for the DSLR, the traditional camera of choice for enthusiast photographers and it can be hard to decide which type of camera to opt for.

However, there are three key points that are important to understand about the two camera types when trying to choose between a DSLR vs CSC.

DSLR vs CSC: 01 Size

One of the primary reasons for introducing the CSC genre was to create smaller cameras that can accept different lenses.

Compact system cameras can be made smaller than SLRs because they don’t have a mirror or pentaprism/pentamirror.

As well as the obvious space saving that omitting these components makes, the mirrorless design of a CSC also enables the lens to be mounted closer to the sensor – again shrinking the camera, and in some cases the lenses.

DSLR vs CSC: 02 Viewfinder


DSLRs have an optical viewfinder which shows the scene as it is seen through the lens.

Compact system cameras can’t have an optical through-the-lens (TTL) viewfinder because they don’t have a mirror to reflect light into the pentaprism/mirror.

In many cases the image is composed on the screen of a CSC, just as it is with many compact cameras.

However, in some cases there is an electronic viewfinder (EVF), which is made from a small screen (often an LCD).

Some cameras are even compatible with an optional external EVF.

These allow the image to be composed with the camera held to the eye, which is useful in very bright conditions or with moving subjects.

Crucially, an EVF shows the image that is formed on the imaging sensor.

The first EVFs were low-quality affairs and this has given them a bad name that has been hard to shake-off.

The image in the EVFs in most modern compact system cameras may not be quite as smooth as the one in an SLR’s viewfinder, but it has the advantage of being able to show how the image will look when it is captured, taking into account the exposure, colour and white balance settings.

DSLR vs CSC: 03 Focusing

Much of the development in DSLRs and compact system cameras has centred around the speed and accuracy of their autofocus (AF) systems.

For SLRs the challenge is to produce faster, smoother focusing in live view and video mode as the phase detection AF systems that they use when the image is composed in the viewfinder are generally fast and efficient.

Most compact system cameras use contrast detection autofocusing (the same as many SLRs in live view mode) and this is generally slower than phase detection – especially in low light.

Some manufacturers, however, have managed to produce AF systems for their CSCs which challenge those of similarly priced SLRs.

On the whole, an SLR’s live view and video AF system is much slower than a CSC’s, but SLR manufacturers are starting to make improvements by developing hybrid systems and even sensor-based phase detection systems.

Although you can shoot sport and action with a compact system camera, as a rule DSLRs are more suited to doing so because the focusing system when using the viewfinder is usually more versatile, faster and more sensitive.

6 ways professional photographers use their cameras

Professional photographers use their cameras every day, so they get to know it really well and understand the best way to set it up and use it. In their latest guest blog post the photo management and Canon Project1709 experts at Photoventure spoke to pros in many different fields to find their six most useful tips for using your camera effectively.

1. Back-button focusing

By default cameras are set to focus the lens and activate exposure metering when the shutter release button is half-pressed.

This works well in many situations, but if you’re waiting for a moving subject to come into the frame, or for the composition to improve, you have to keep your finger on the shutter release or the focus may change from what you see in the viewfinder when you press it home.

It’s also easy to press the shutter release too far in your enthusiasm and take a sequence of unwanted shots.

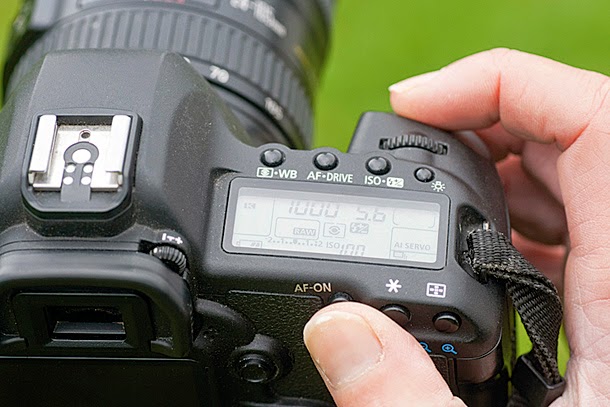
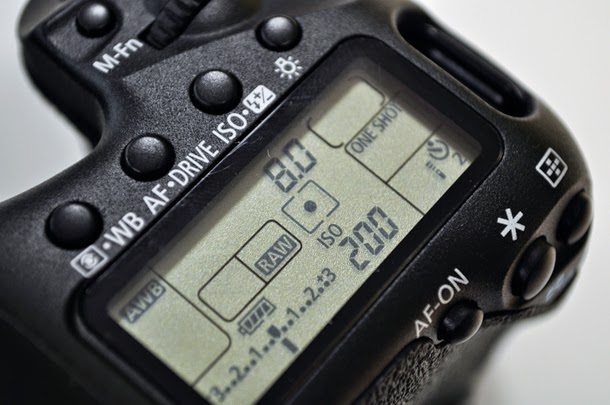
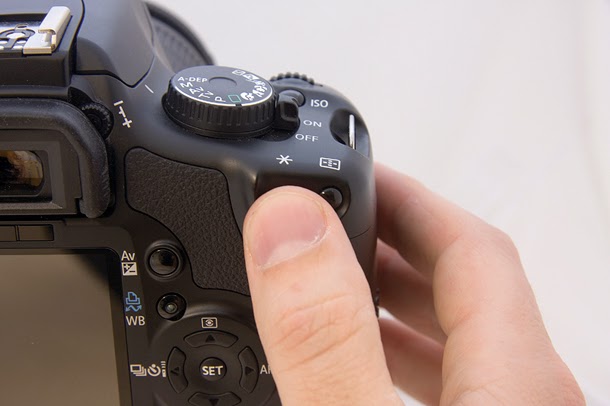
Consequently, many pros use a technique called ‘back-button focusing’, which uses a button on the back of the camera (often labelled AF-on) to control focusing.

Splitting the shutter release and focus control enables you to take a shot without refocusing the lens.

It’s especially useful when there’s a danger of another object coming between the camera and the subject because the lens won’t shift focus unless you press the AF-on button.

Your camera’s manual will explain exactly how to set-up your camera for back-button focusing, but the option you need is usually located in the Custom settings menu.


2. Advanced exposure modes

In changing lighting conditions aperture and shutter priority offer a convenient way of ensuring that exposure is correct whilst still retaining control over the most important aspects of the image.

Shutter priority is a good choice when you’re shooting sport or action as it determines whether the subject will be rendered sharp or blurred.

When depth of field is more important, however, aperture priority is the logical choice as you set the aperture while the camera sets the shutter speed.

For the ultimate in control, manual exposure mode is the way to go.

This allows you to set both the aperture and shutter speed, giving you control over depth of field and sharpness/blur.

It’s especially useful in high contrast situations as you set the exposure for the subject (using information gathered from the spotmeter) and you can shoot knowing that it will be correct whatever’s going on in the background.

Music photographers rely on manual exposure mode because once the exposure is set for the subject when the stage lights are in the right position, they just have to wait for the composition and lighting to look right in the viewfinder and fire away.

3. Spot metering

Although the default evaluative or matrix metering systems of modern cameras generally work very well, many pros like to take control over exposure a little more and use spot metering to meter for very precise areas within the scene.

The advantage of this approach is that they can ensure that the main subject is correctly exposed whatever the lighting conditions.

They can also meter from a mid-tone area to get the maximum range of tones in a high-contrast situation.

Spot metering is especially useful if your subject is backlit as many multi-area metering systems would be tricked into underexposure by the light in the background.

4. AE-Lock

When shooting in aperture or shutter priority mode in tricky lighting conditions many pros use their camera’s auto-exposure lock (AE-Lock) in combination with spot metering because it locks the exposure settings to a particular value.

With a high contrast scene, for example, they might position the metering spot over a mid-tone area and press the AE-Lock button to set the exposure at the suggested value.

They then compose the image and take the shot safe in the knowledge that the exposure won’t change when the shutter release is pressed.

In some cases the AE-Lock remains active for just a few seconds, but it’s often possible to set it to operate until the button is pressed a second time.

The latter is especially useful if you have to wait for the composition to come good.

5. Shoot and crop


Although pro-level cameras tend to have huge numbers of AF points, many professional sports photographers just stick to using the central points and then crop their images post-capture.

They do this for several reasons. Firstly, the central AF points are the most sensitive and accurate so they get the subject sharp quickly.

But also, it’s quicker to just use one AF point rather than constantly shifting the active AF point around the frame.

In addition, this is a more flexible approach that makes it less likely that they’ll miss an important part of the scene by composing too tightly.

6. Fill-in flash


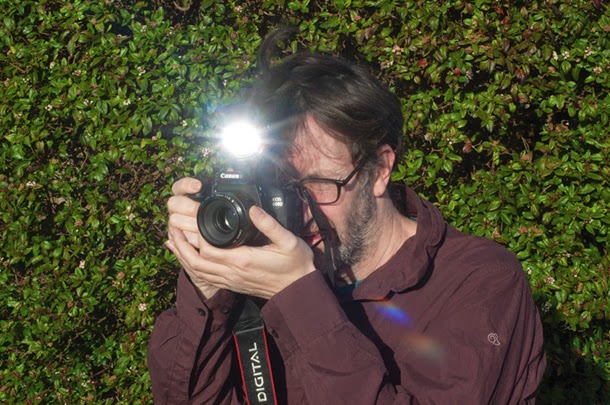
News, event and social photographers always use flash because it brings their subject to life, helps separate it from the background a little and gets rid of harsh shadows.

As most pro-level cameras don’t have a flash built-in this light comes from a flashgun, which has the added benefit of being a bit further away from the lens than a pop-up flash and this reduces the chance of red-eye.

In some cases they may have the flash on a bracket so it’s even further away from the lens than when it’s mounted on top of the camera.

Many pros also use a diffuser to soften the light and make it more flattering.

After all, it’s in the interests of a social photographer to make their subject look good.